How to assemble the Tuftinglove starter frame
Yay! You got your Tuftinglove starter kit and now you can’t wait to create your first piece of art on the tufting frame. Speaking of which: With our starter set comes a pre-build frame that you assemble yourself with a few simple steps. Let us show you how this works.
With this starter kit you get:
- a tufting machine (cut or loop pile, depending on your choice)
- 3 pieces of tufting cloth
- The starter tufting frame consisting of:
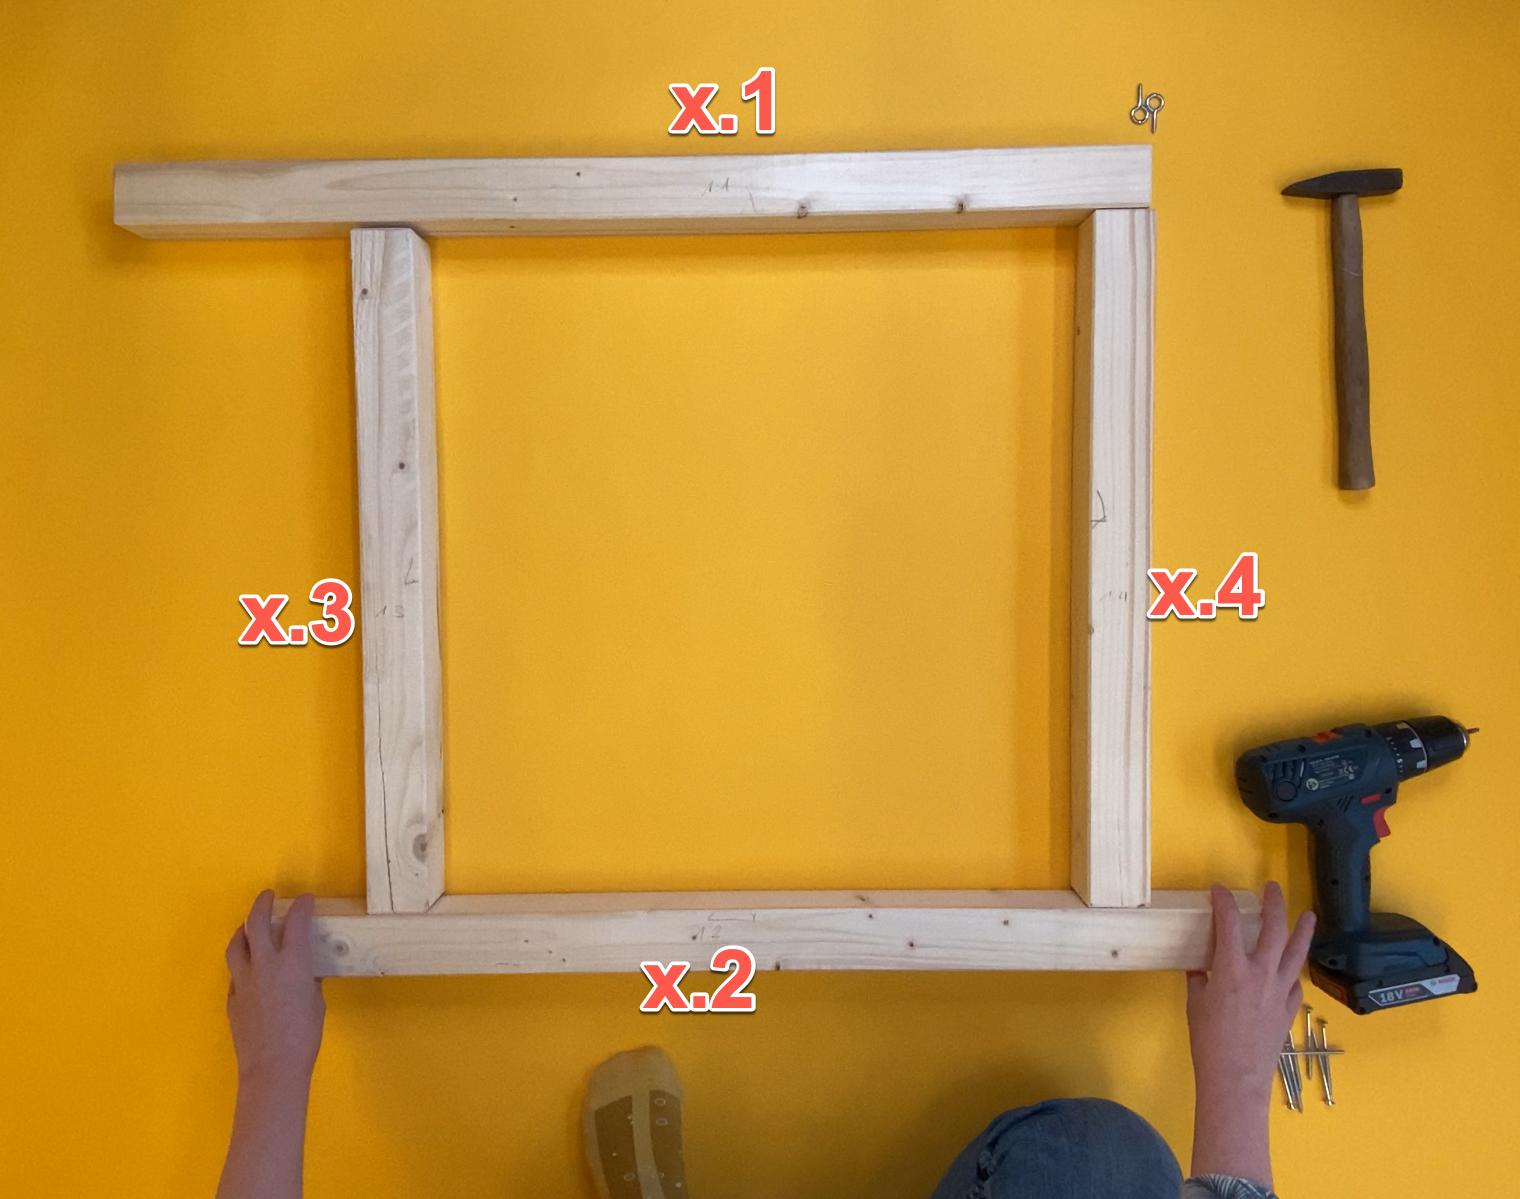
- x.1 Top piece
- x.2 Bottom piece
- x.3 left side
- x.4 right side
- 8 nail tags (60 cm each)
- 8 screws
- 2 eyelets
Furthermore, you need
- a hammer
- a screwdriver suitable for Torx20 screws or an electric screwdriver with a T20 bit.
And now let’s get to work and start to assemble your frame!
Lay out the four wooden pieces on a table or on the floor in front of you. They are numbered from x.1 to x.4. Lay them out so that you can read the numbers.
As you see on the picture: x.1 is the top part, x.2 is the bottom part, x.3. is the left side and x.4 the right side.
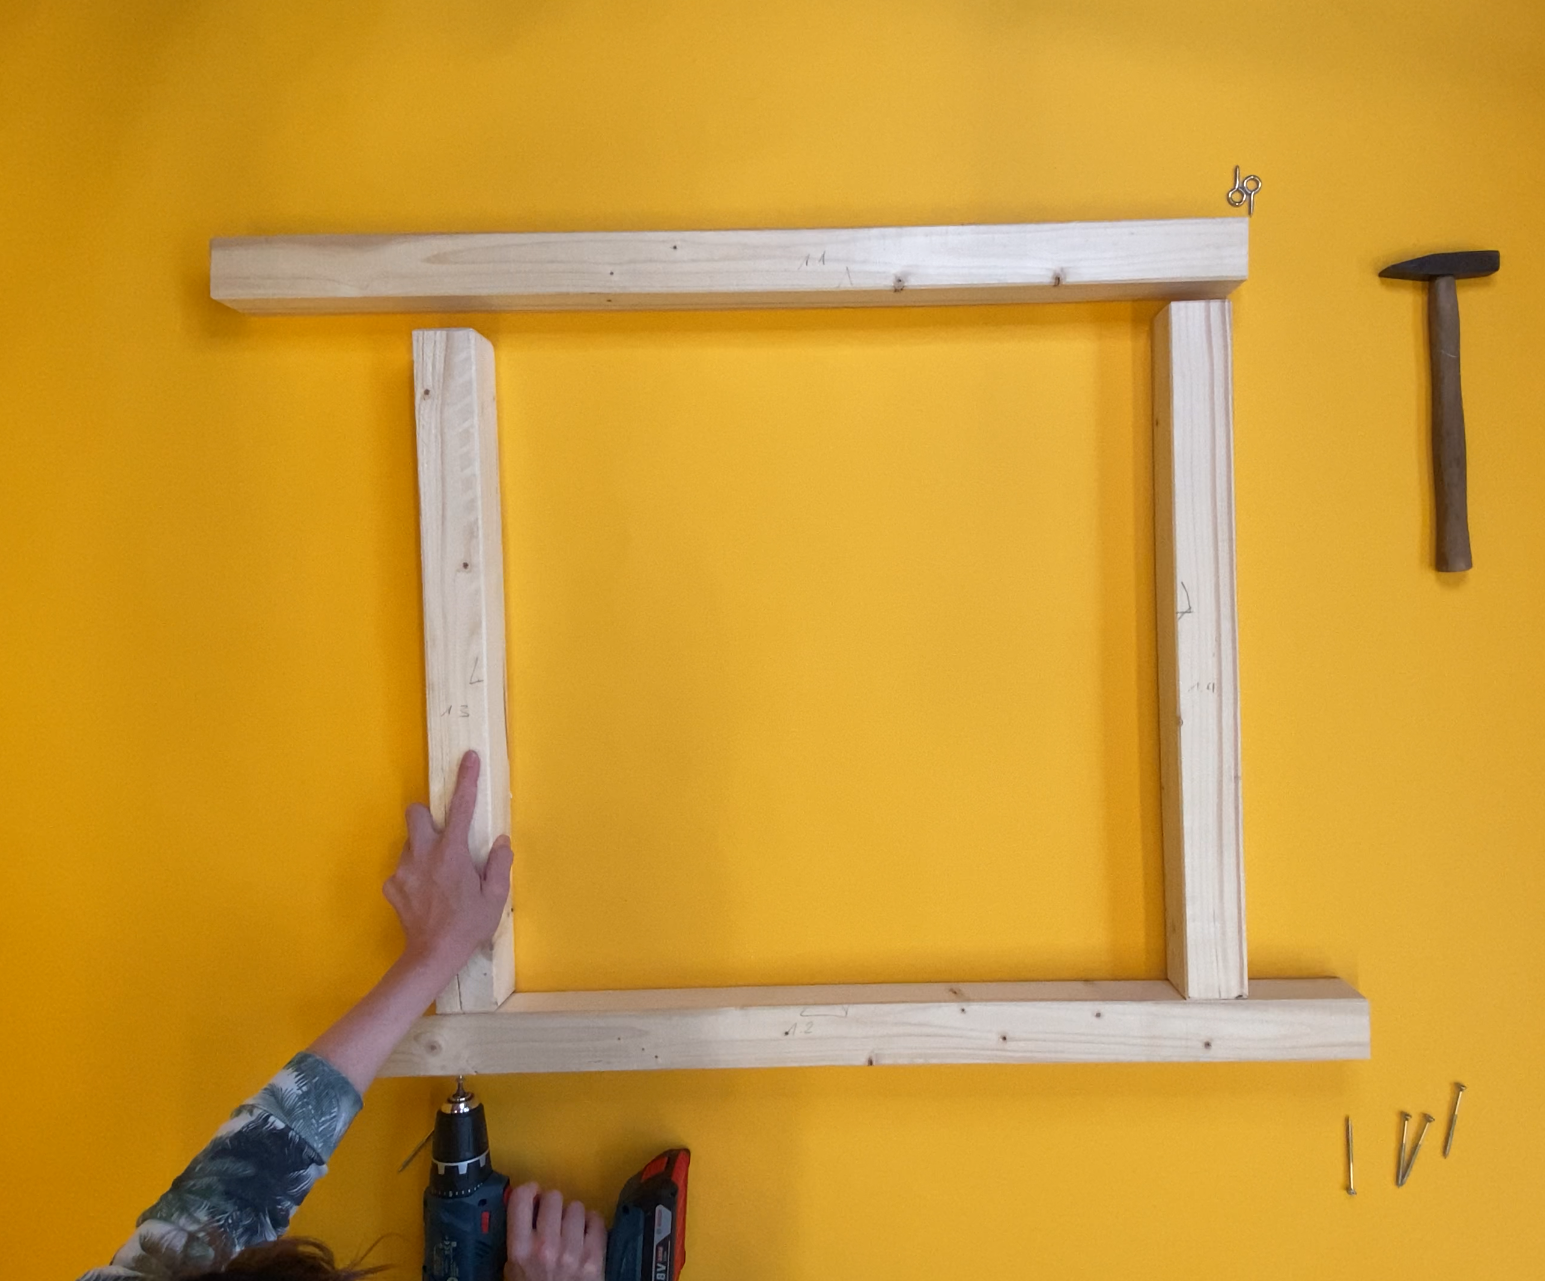
Screw the parts together by screwing the screws that came with the frame into the pre-drilled holes. Make sure you screw all the screws in and everything is really nice and tight put together.
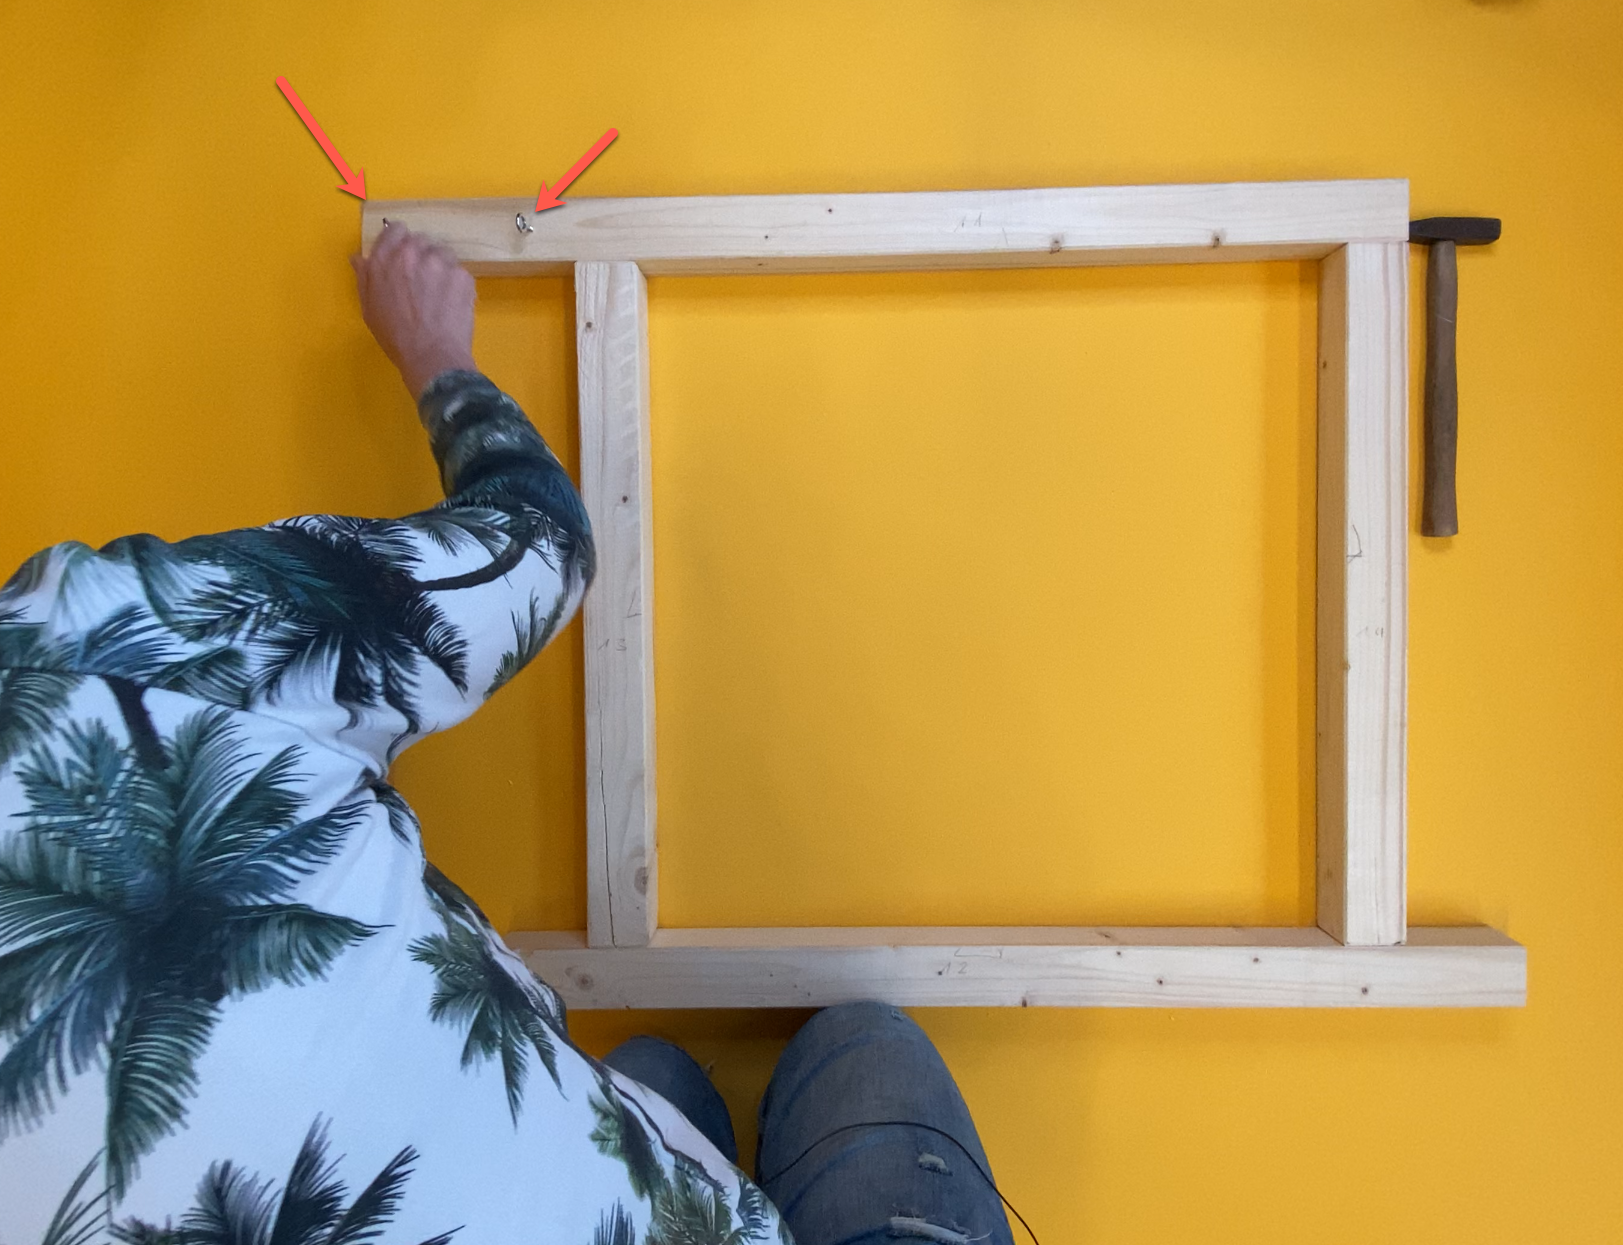
Screw in the 2 eyelets on the top bar on the left side where it overlaps the sides. Make sure to have your frame like this! Feeding the yarn from the left side will make tufting much easier for you. No matter if you are left handed or right handed.
Now you can nail your nail tags down, two rows on each side. Make sure the nails and arrows printed on the nail tags are facing outwards from the tufting frame, otherwise you will not be able to stretch the cloth.

And that’s it – your frame is good to go! Now, follow the starter guide manual to learn how to stretch your tufting cloth properly and what to be aware of when starting to tuft.
To help you even further, we’ve also created a video in which we show you the whole process step by step: