Loop Pile NK02 Tufting Gun: Uneven weave after adjusting the pile height
If it’s your first time tufting make sure you have followed all the points listed below before adjusting your gun: (otherwise jump to the next step)
– Your tufting gun needs to be pushed in the tufting cloth properly. The foot of your tufting gun should be in contact with your tufting cloth at all times.
– Stretch the tufting cloth properly. There is no proper tufting with a loose tufting cloth. You can’t put too much pressure on your cloth. Really stretch it as tight as you can! (This is a big problem when starting tufting)
If you followed these points and you still have an uneven weave you most likely misadjusted your tufting gun.
When you adjust the pile height of your tufting gun and you don’t hit all the boxes perfectly you might end up with en uneven weave (silver/white yarn). What we always want is a nice and tight weave (red yarn).
Be sure to test this with a yarn you know. Some very slippery/silky yarns will almost always leave you with a not so nice weave.
If you have an uneven weave in the back of your tufting cloth (the side you work from) most probably some of the measurements are off.

Check the distance between foot and needle. If this distance is too big, the needle cannot push through the cloth enough and creates an uneven weave. To solve this problem, follow the steps below, to make sure everything is in its place.
Step 1:
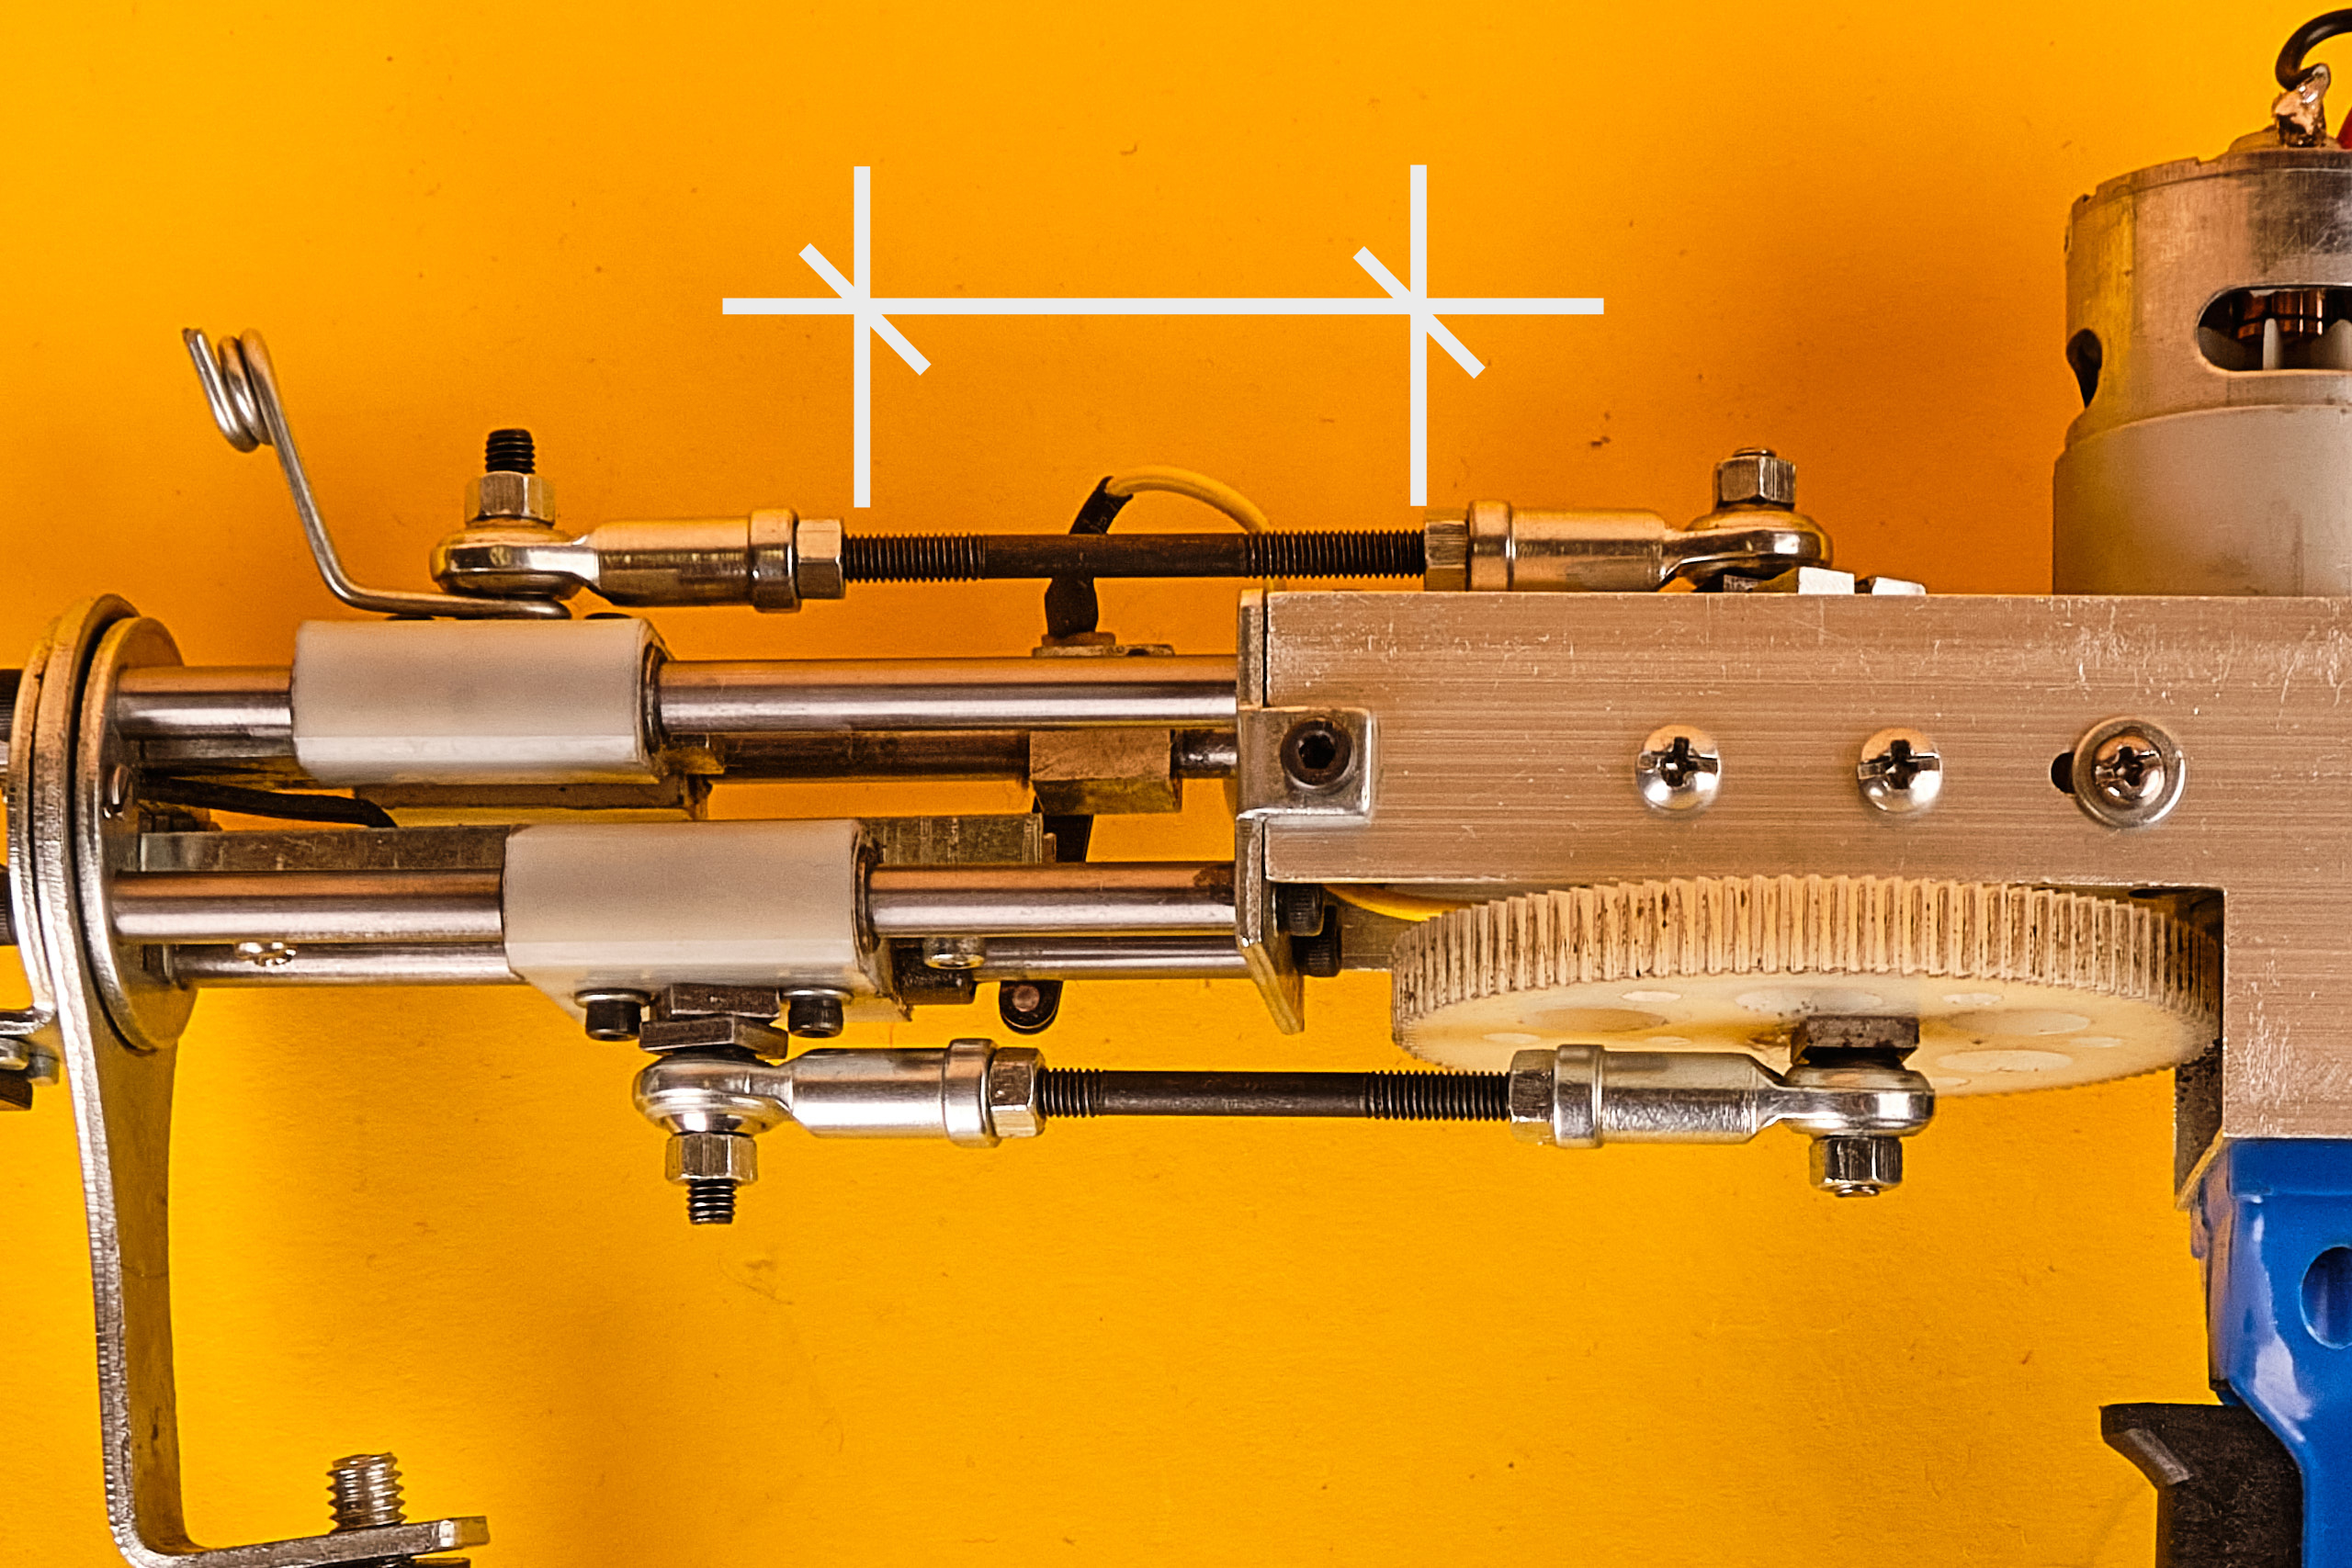
First you want to check the length of your top bearing. The distance should be 57 mm.
(This and the foot you never need to change. If you did by accident, set it back to 57 mm)
If this is set correctly go to the next step.
Step 2:
Foot placement
First make sure your top bearing also has the distance of 57 mm.
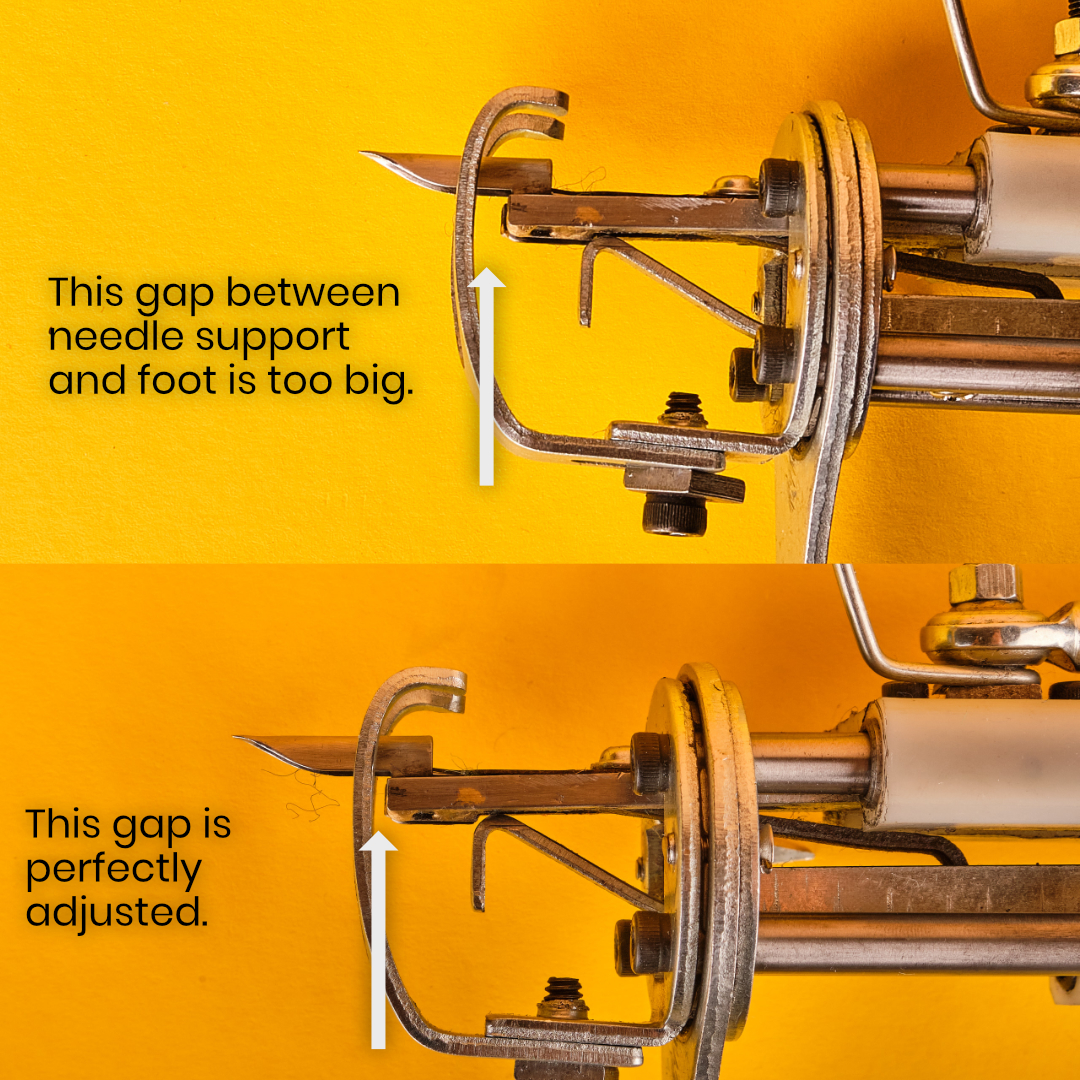
Then adjust the foot as shown in the picture. You want to have a tiny little gap between needle support and the foot.
Also make sure the the needle sits in the center of the foot when you tightened it.
Step 3:
Placement of the screw in the guiding gap.
Your smallest allen key slips into the gap between pusher and foot.
You should now be able to set any pile height from 4 to 14 mm by just adjusting the pile height screw.
Make sure there is this tiny gap between pusher and foot. As shown in the picture you can check that with the smallest allen key that comes with your tufting gun.

Step 4:
Double check
There has to be a small gap between foot and needle support part, but it should not be too big – as shown in the picture.
If the gap is too big, you can see the needle a bit more inwards to get an even weave.

As you might see, all the measurements and adjustments play together very closely.
Thats why we prepared the overview article on our Loop pile NK02 Tufting guns. Check it out again here, to start from a clean base again.