Loop Pile NK02 Tufting Gun: Everything you need to know about your tufting gun
In this article we are giving you a general overview over our Loop Pile NK02 Tufting gun. We explain all the parts as well as the standard measurements needed for a proper setup.
Important: Whenever you are making adjustments on your tufting gun, always unplug it!
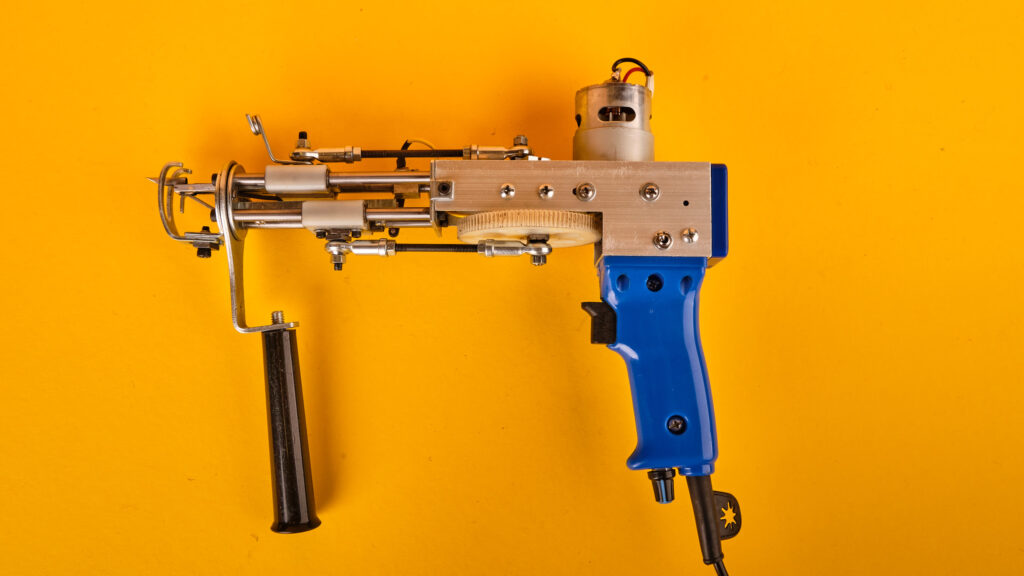
Let’s get an overview over all the parts.
- Main switch
- Speed regulator
- Trigger
- Main gear
- Position sensor
- Yarn feeder
- Needle
- Guide
- Pusher
- Foot
- Pile height adjustment screw
- Lower bearing
- Top bearing
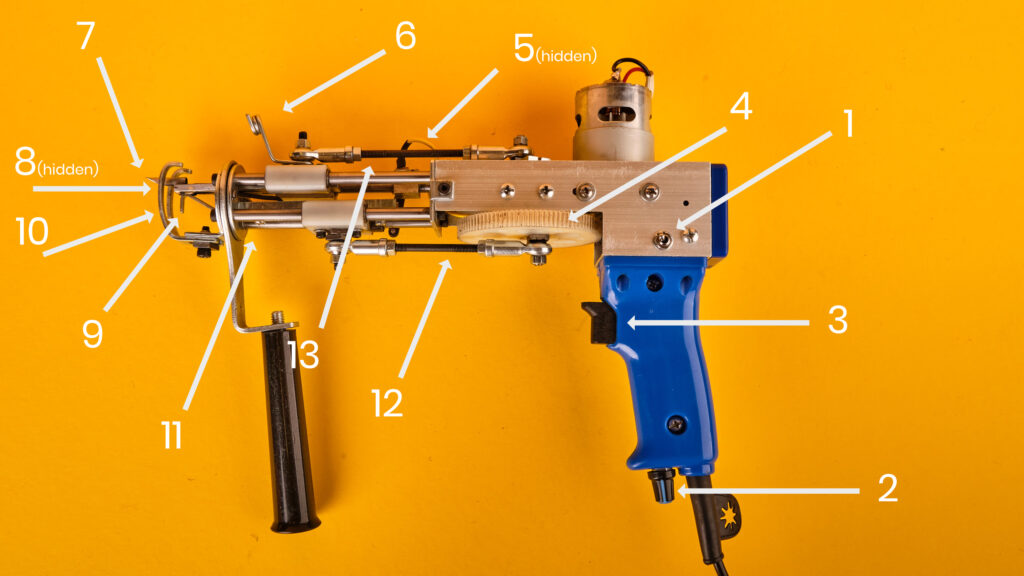
1 Main switch
This is where you turn on and off your machine.
A tutorial on replacing this part will be added soon

2 Speed regulator
With this knob you can go from slowest to highest speed. The faster you set it the faster you need to tuft and therefore move your machine.
We recommend starting with the slowest setting until you have a feeling for the machine.
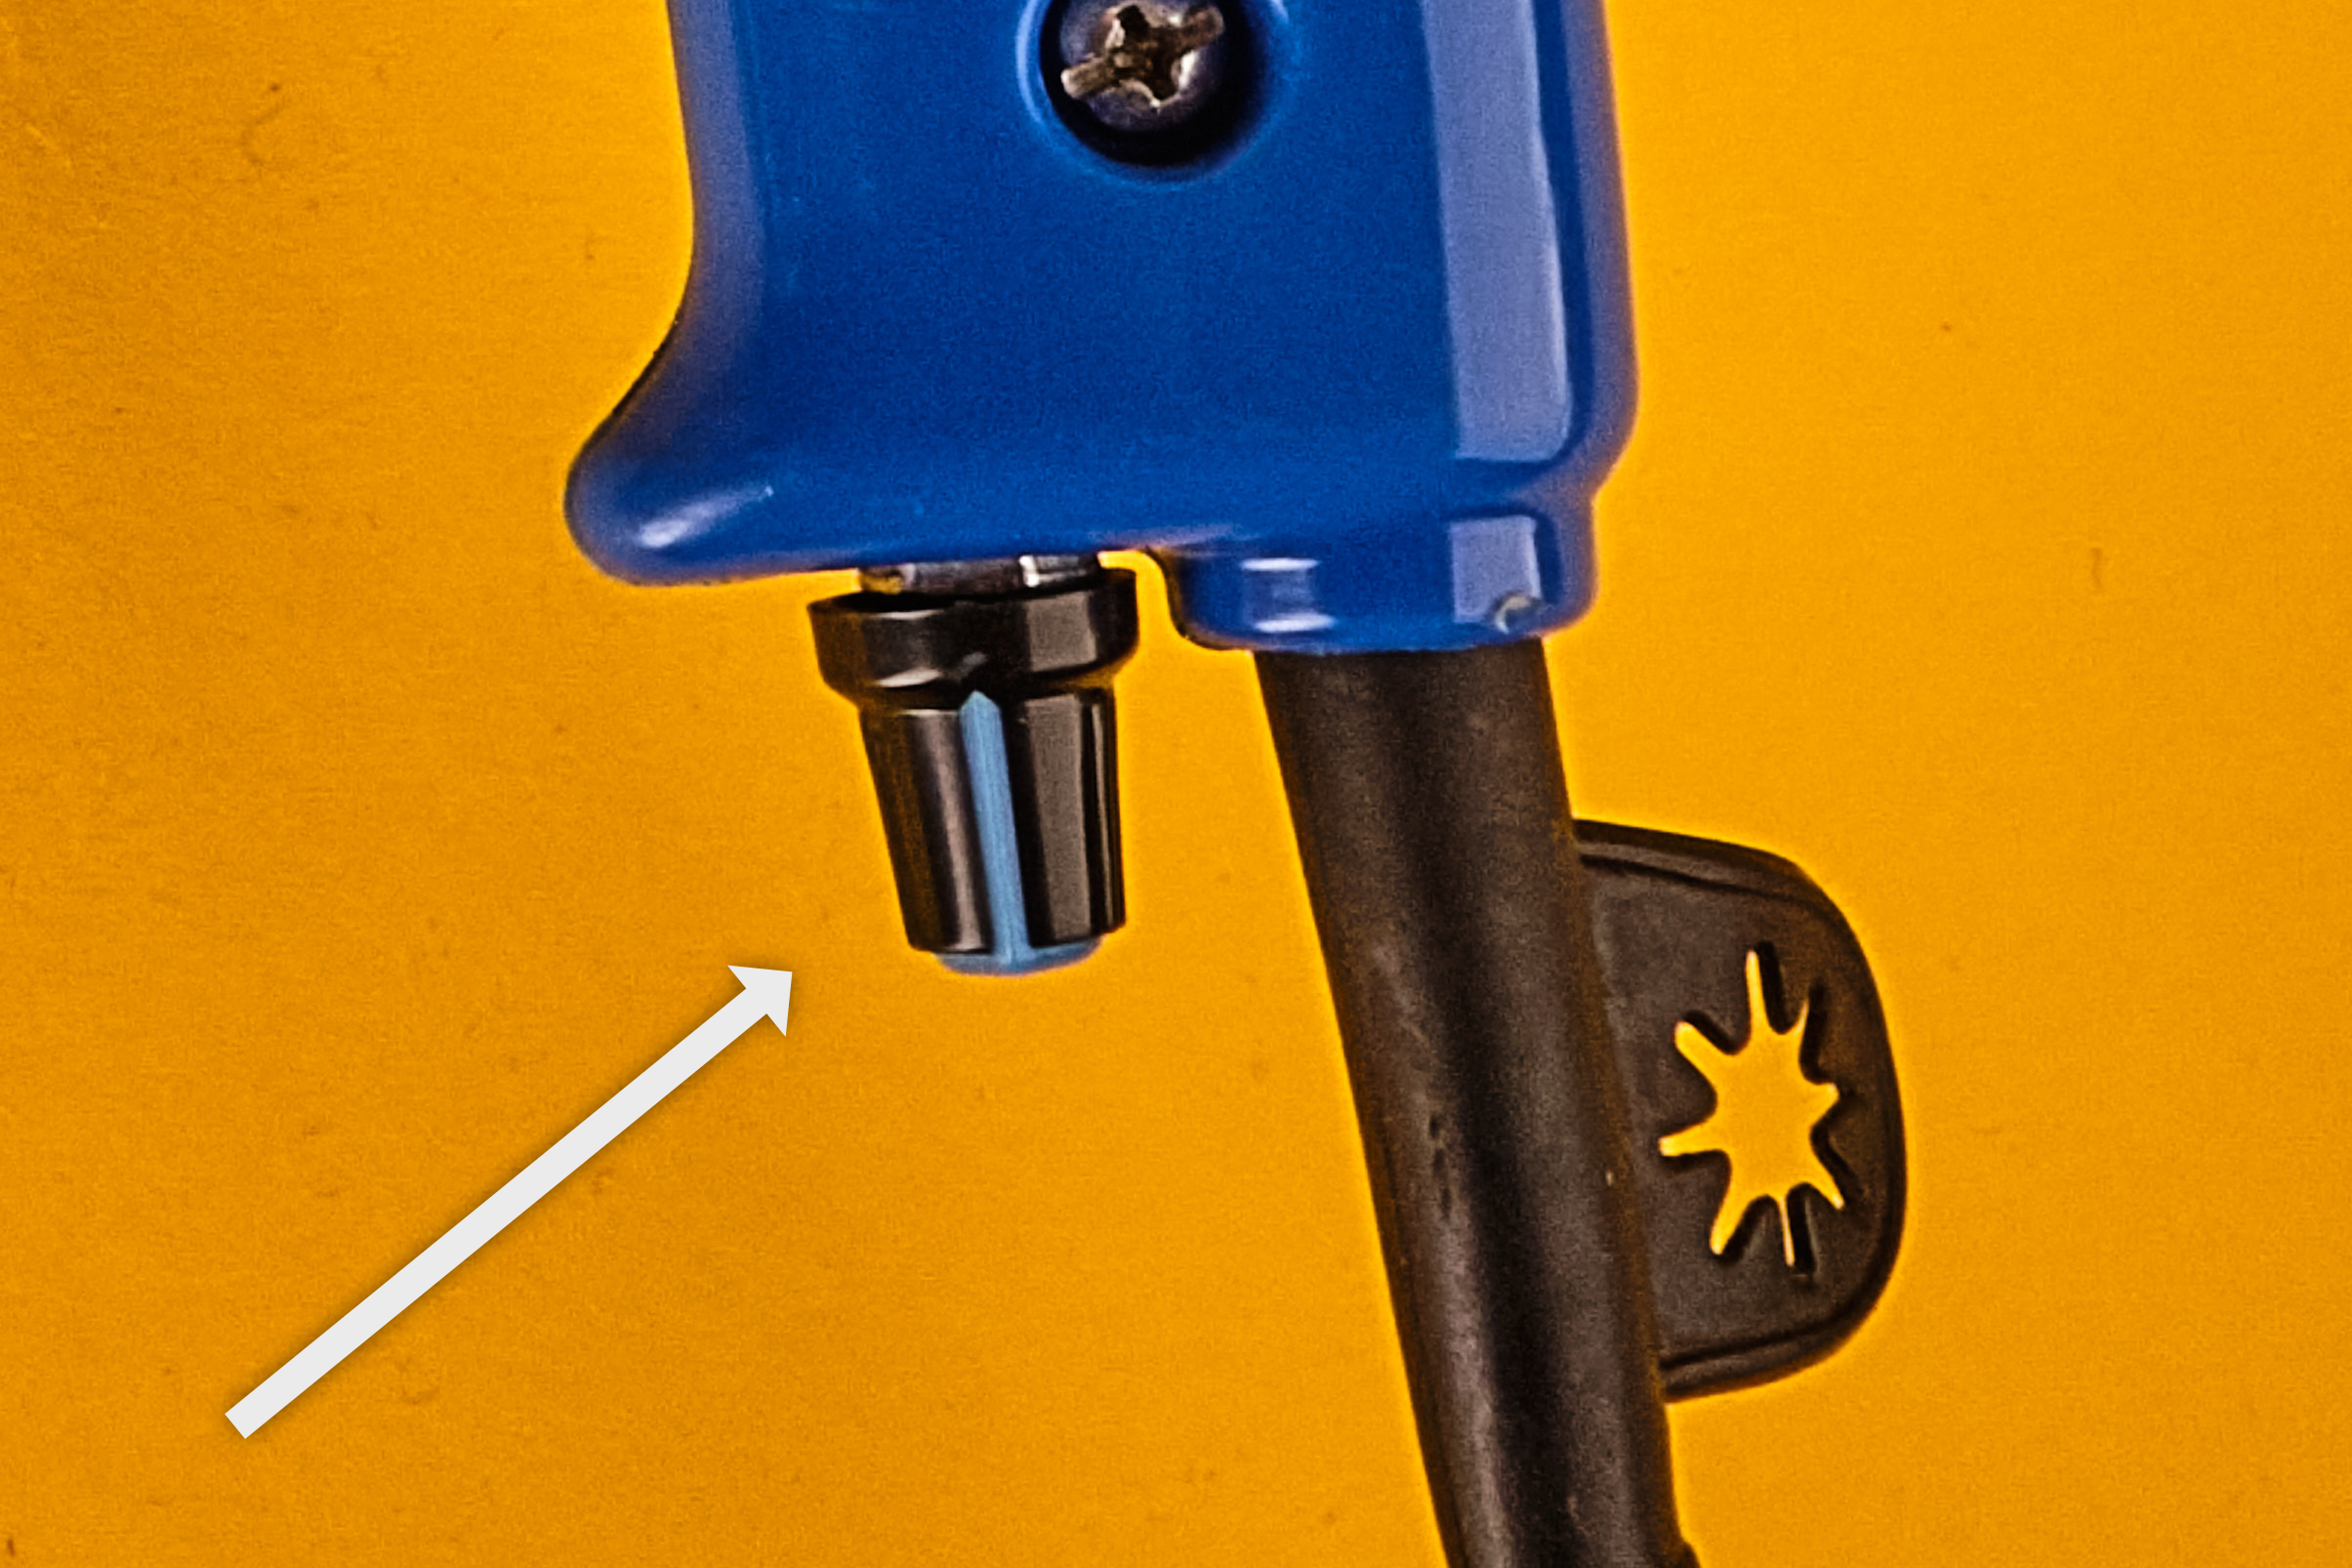
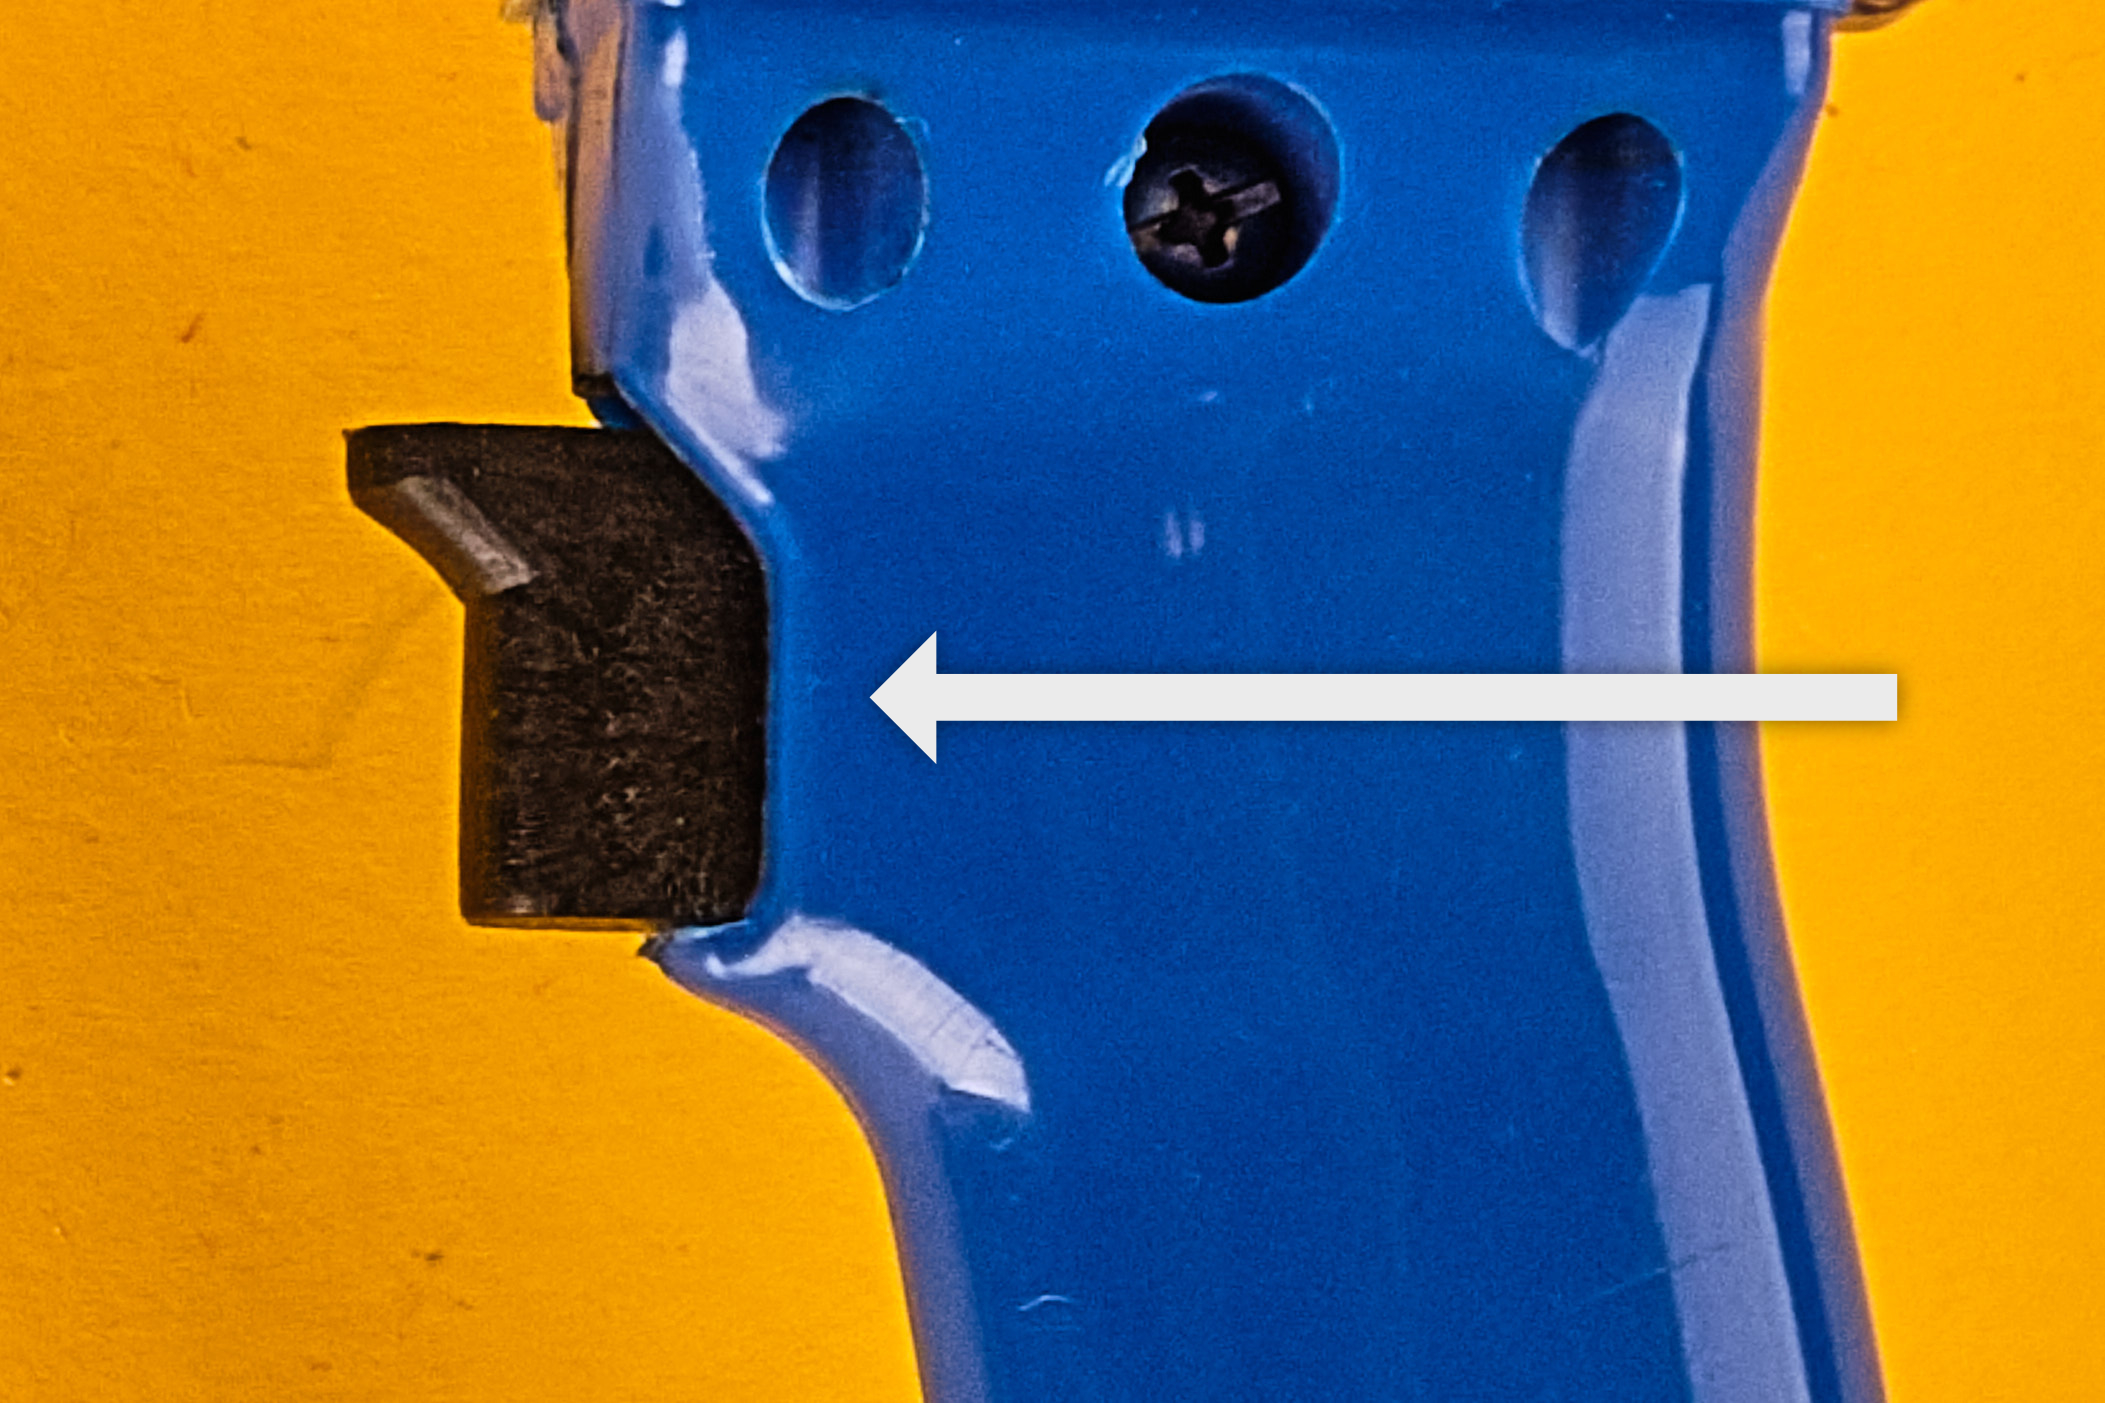
3 Trigger
With the trigger you actually make your gun turn on and tuft. The trigger is a simple on and off switch, pressure is not regulating speed. The speed has to be set with the speed regulator knob.
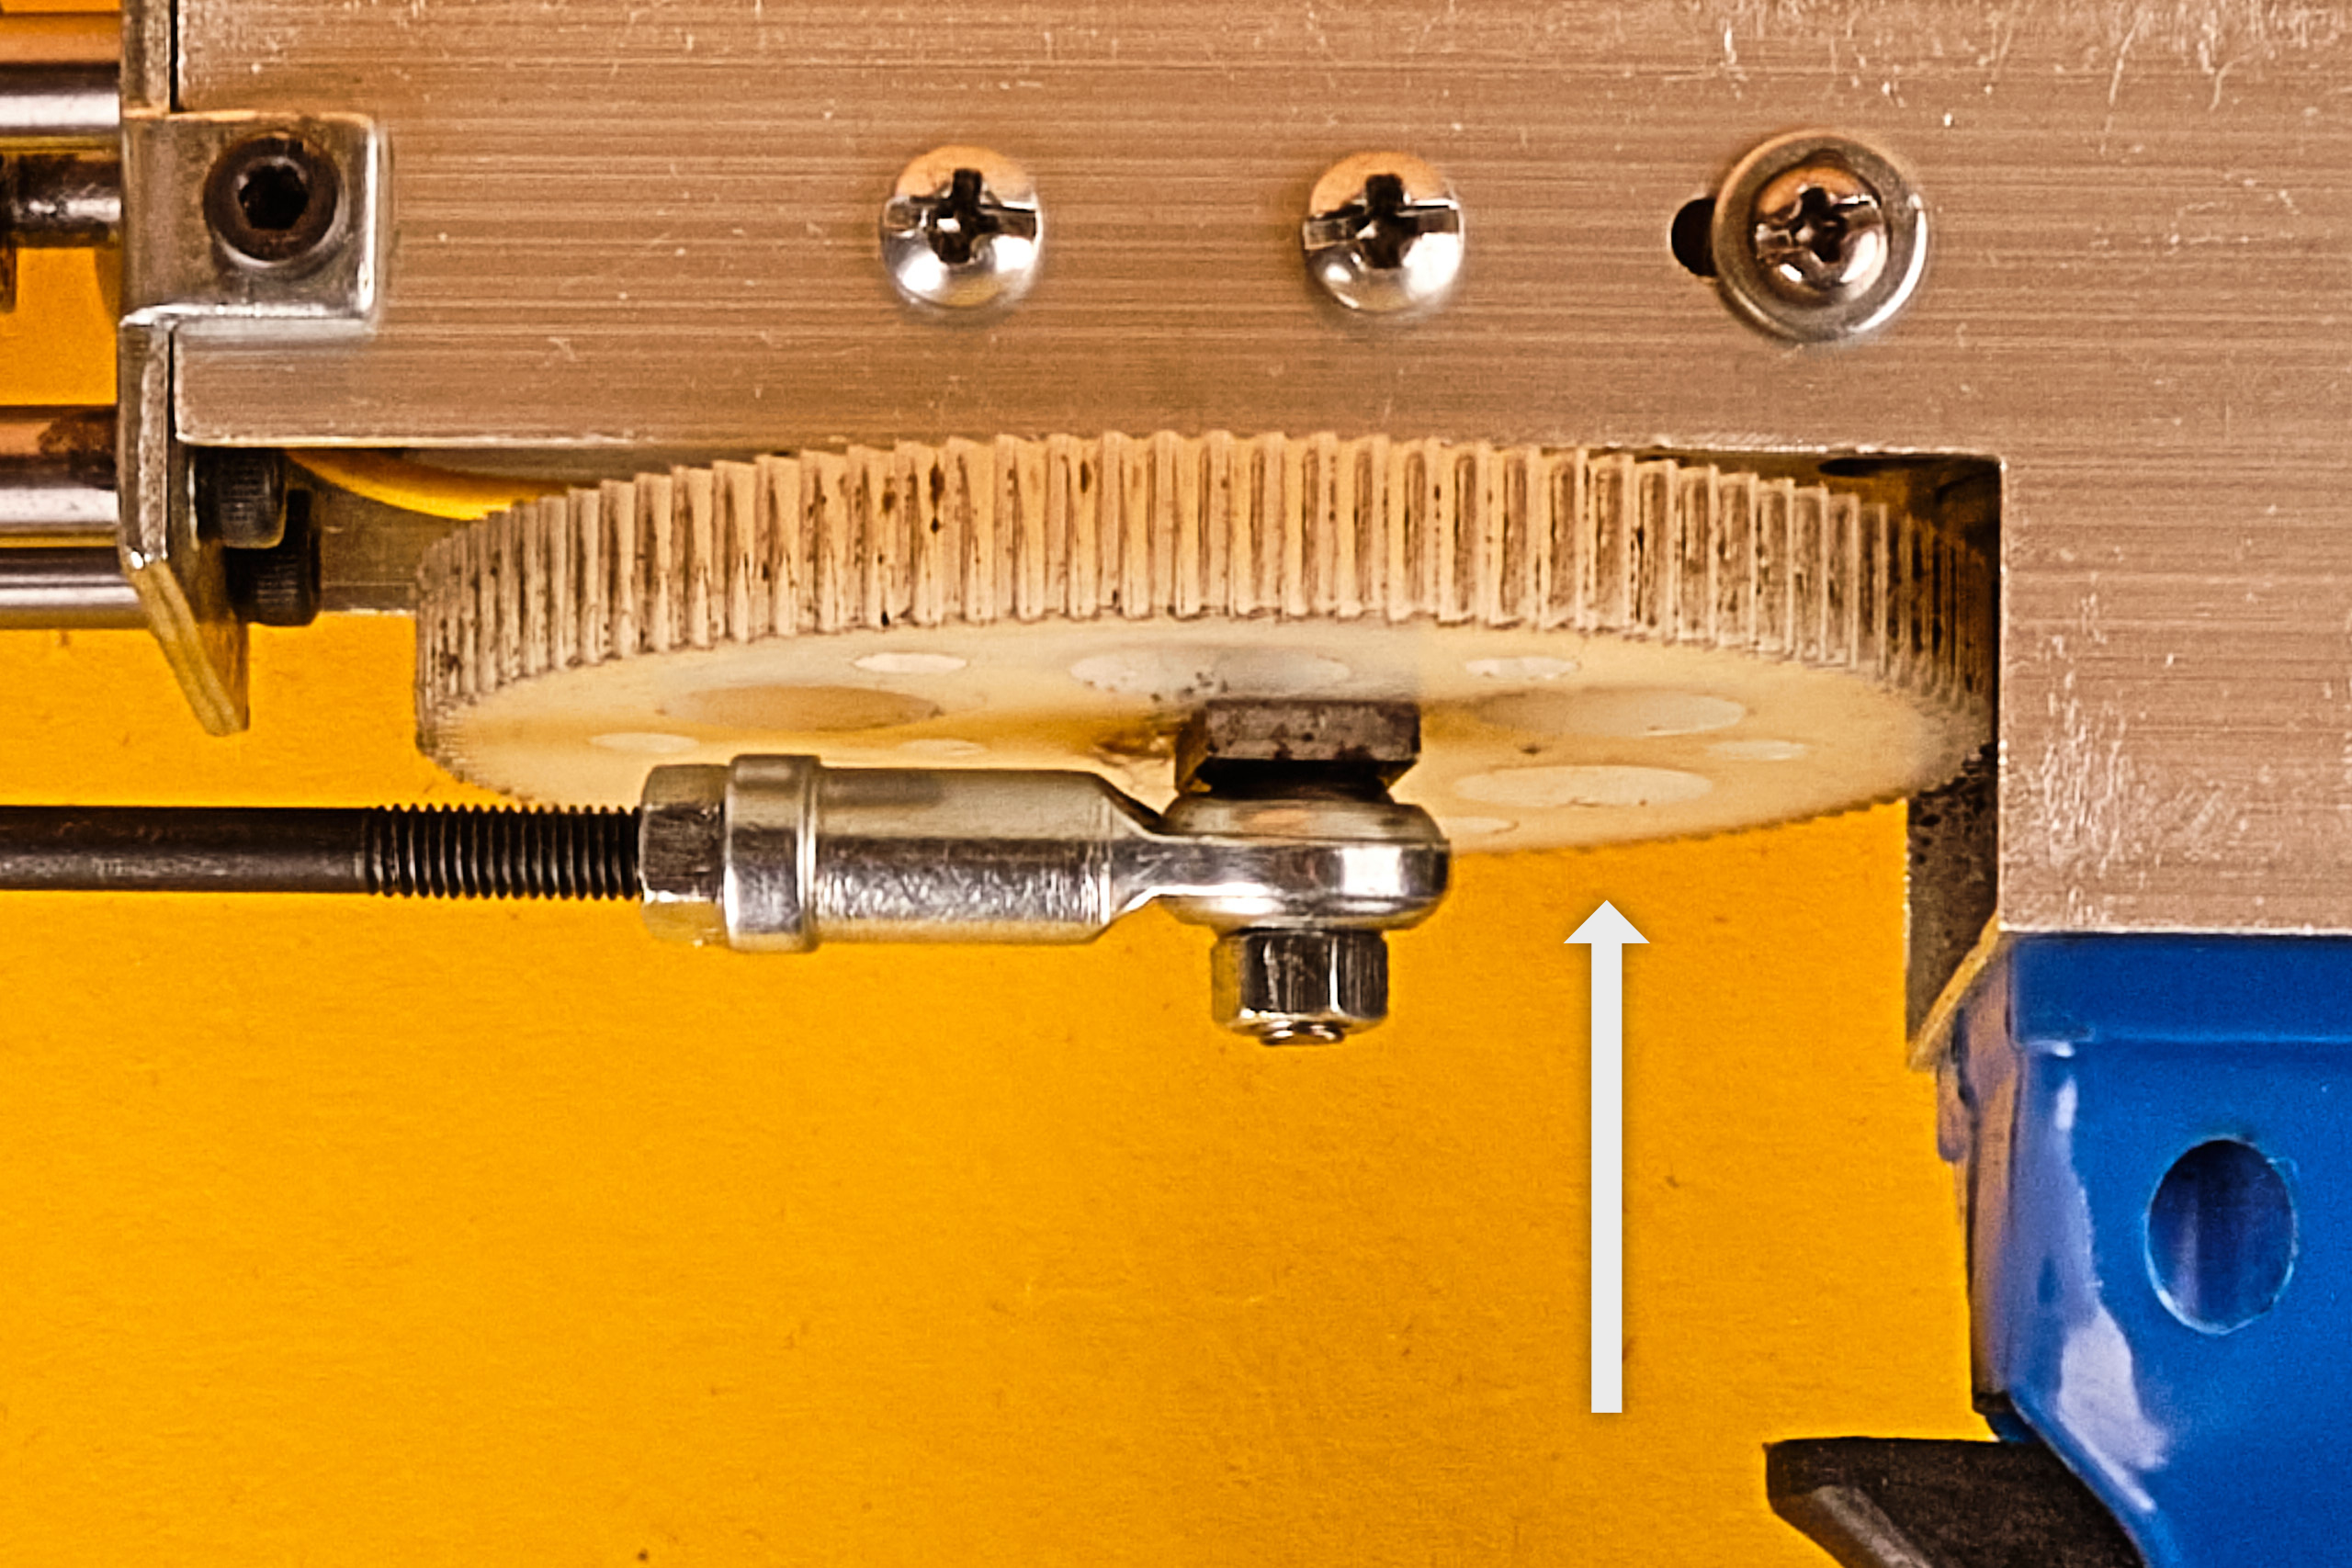
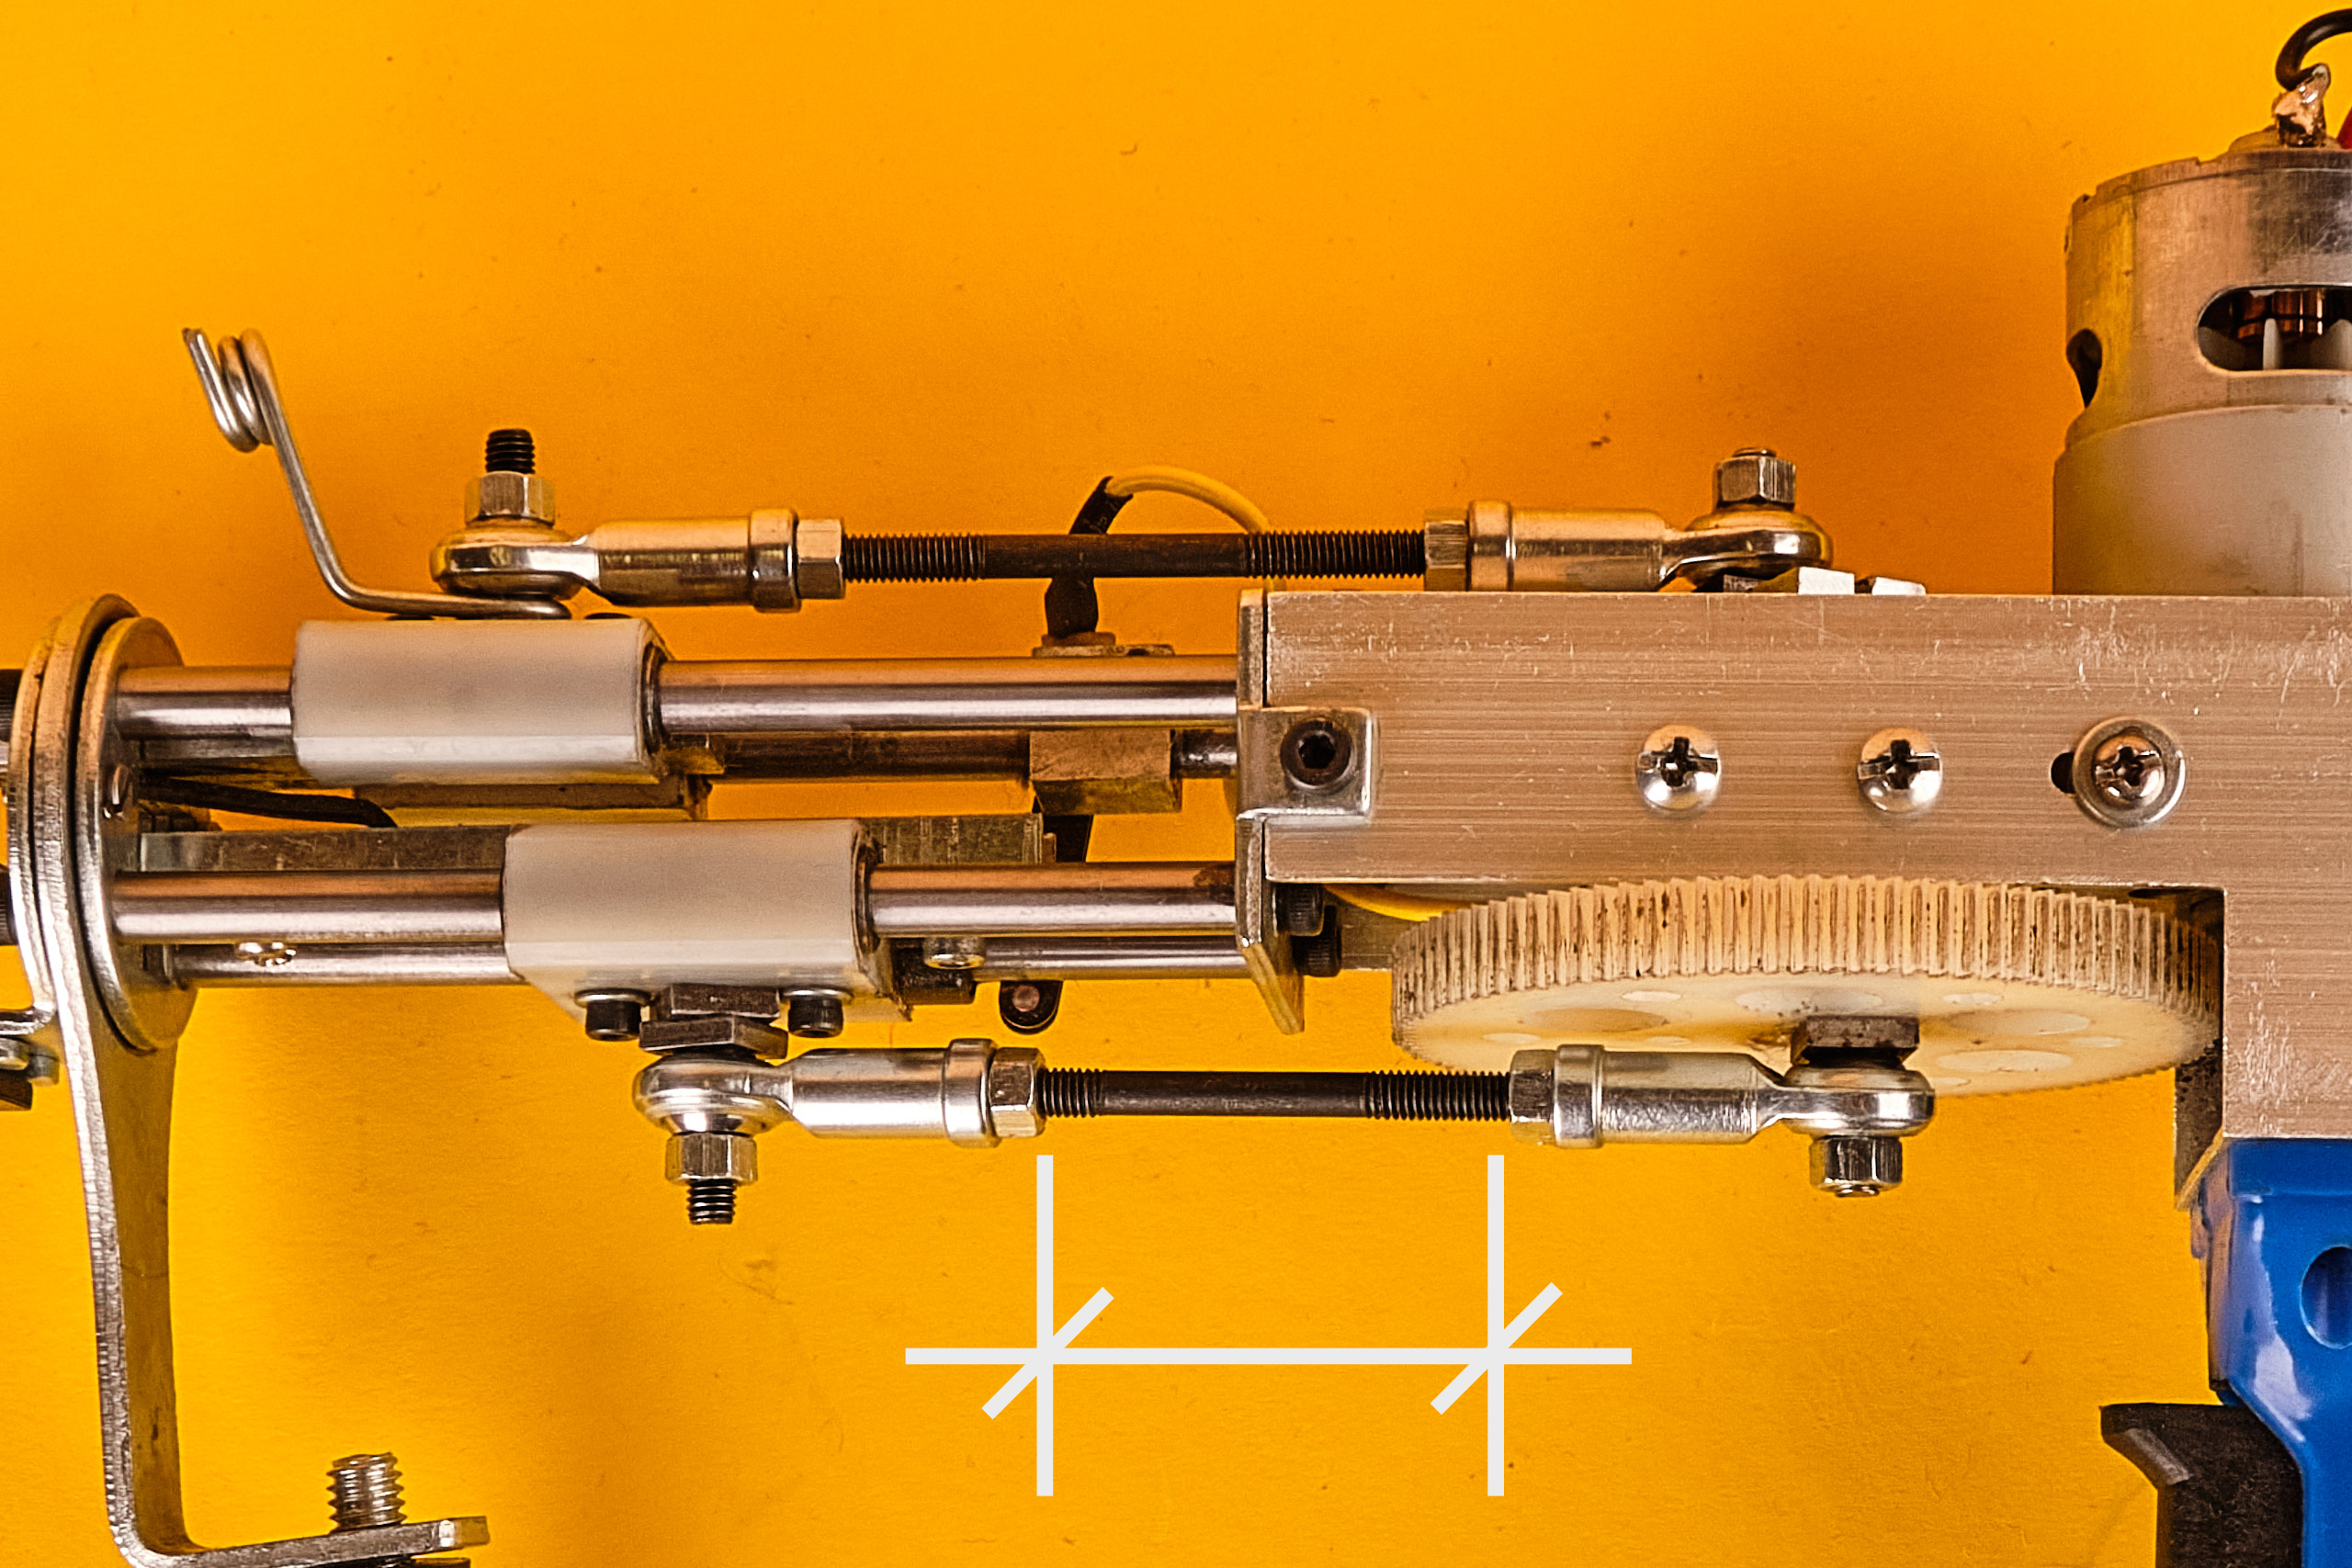
4 Main gear
The main gear is the connection between the motor of the gun and all the bearing parts connected to the needle.
Make sure you feed your yarn properly so it can’t get stuck in the gear.
A troubleshooting tutorial for this is coming soon.
5 Position Sensor
This sensor is checking the needle position and takes care of sending the right signals to the motor to make sure it works in a perfect tufting rythm.
6 Yarn feeder
Always guide your yarn through this little loop before threading it through your needle. This helps with keeping your yarn away from all the moving parts.

7 Needle
With the needle you poke through your tufting cloth after threading it with your yarn. The needle is going to create loops with the help of the guide (8).
You can find more about yarn feeding and threading here.
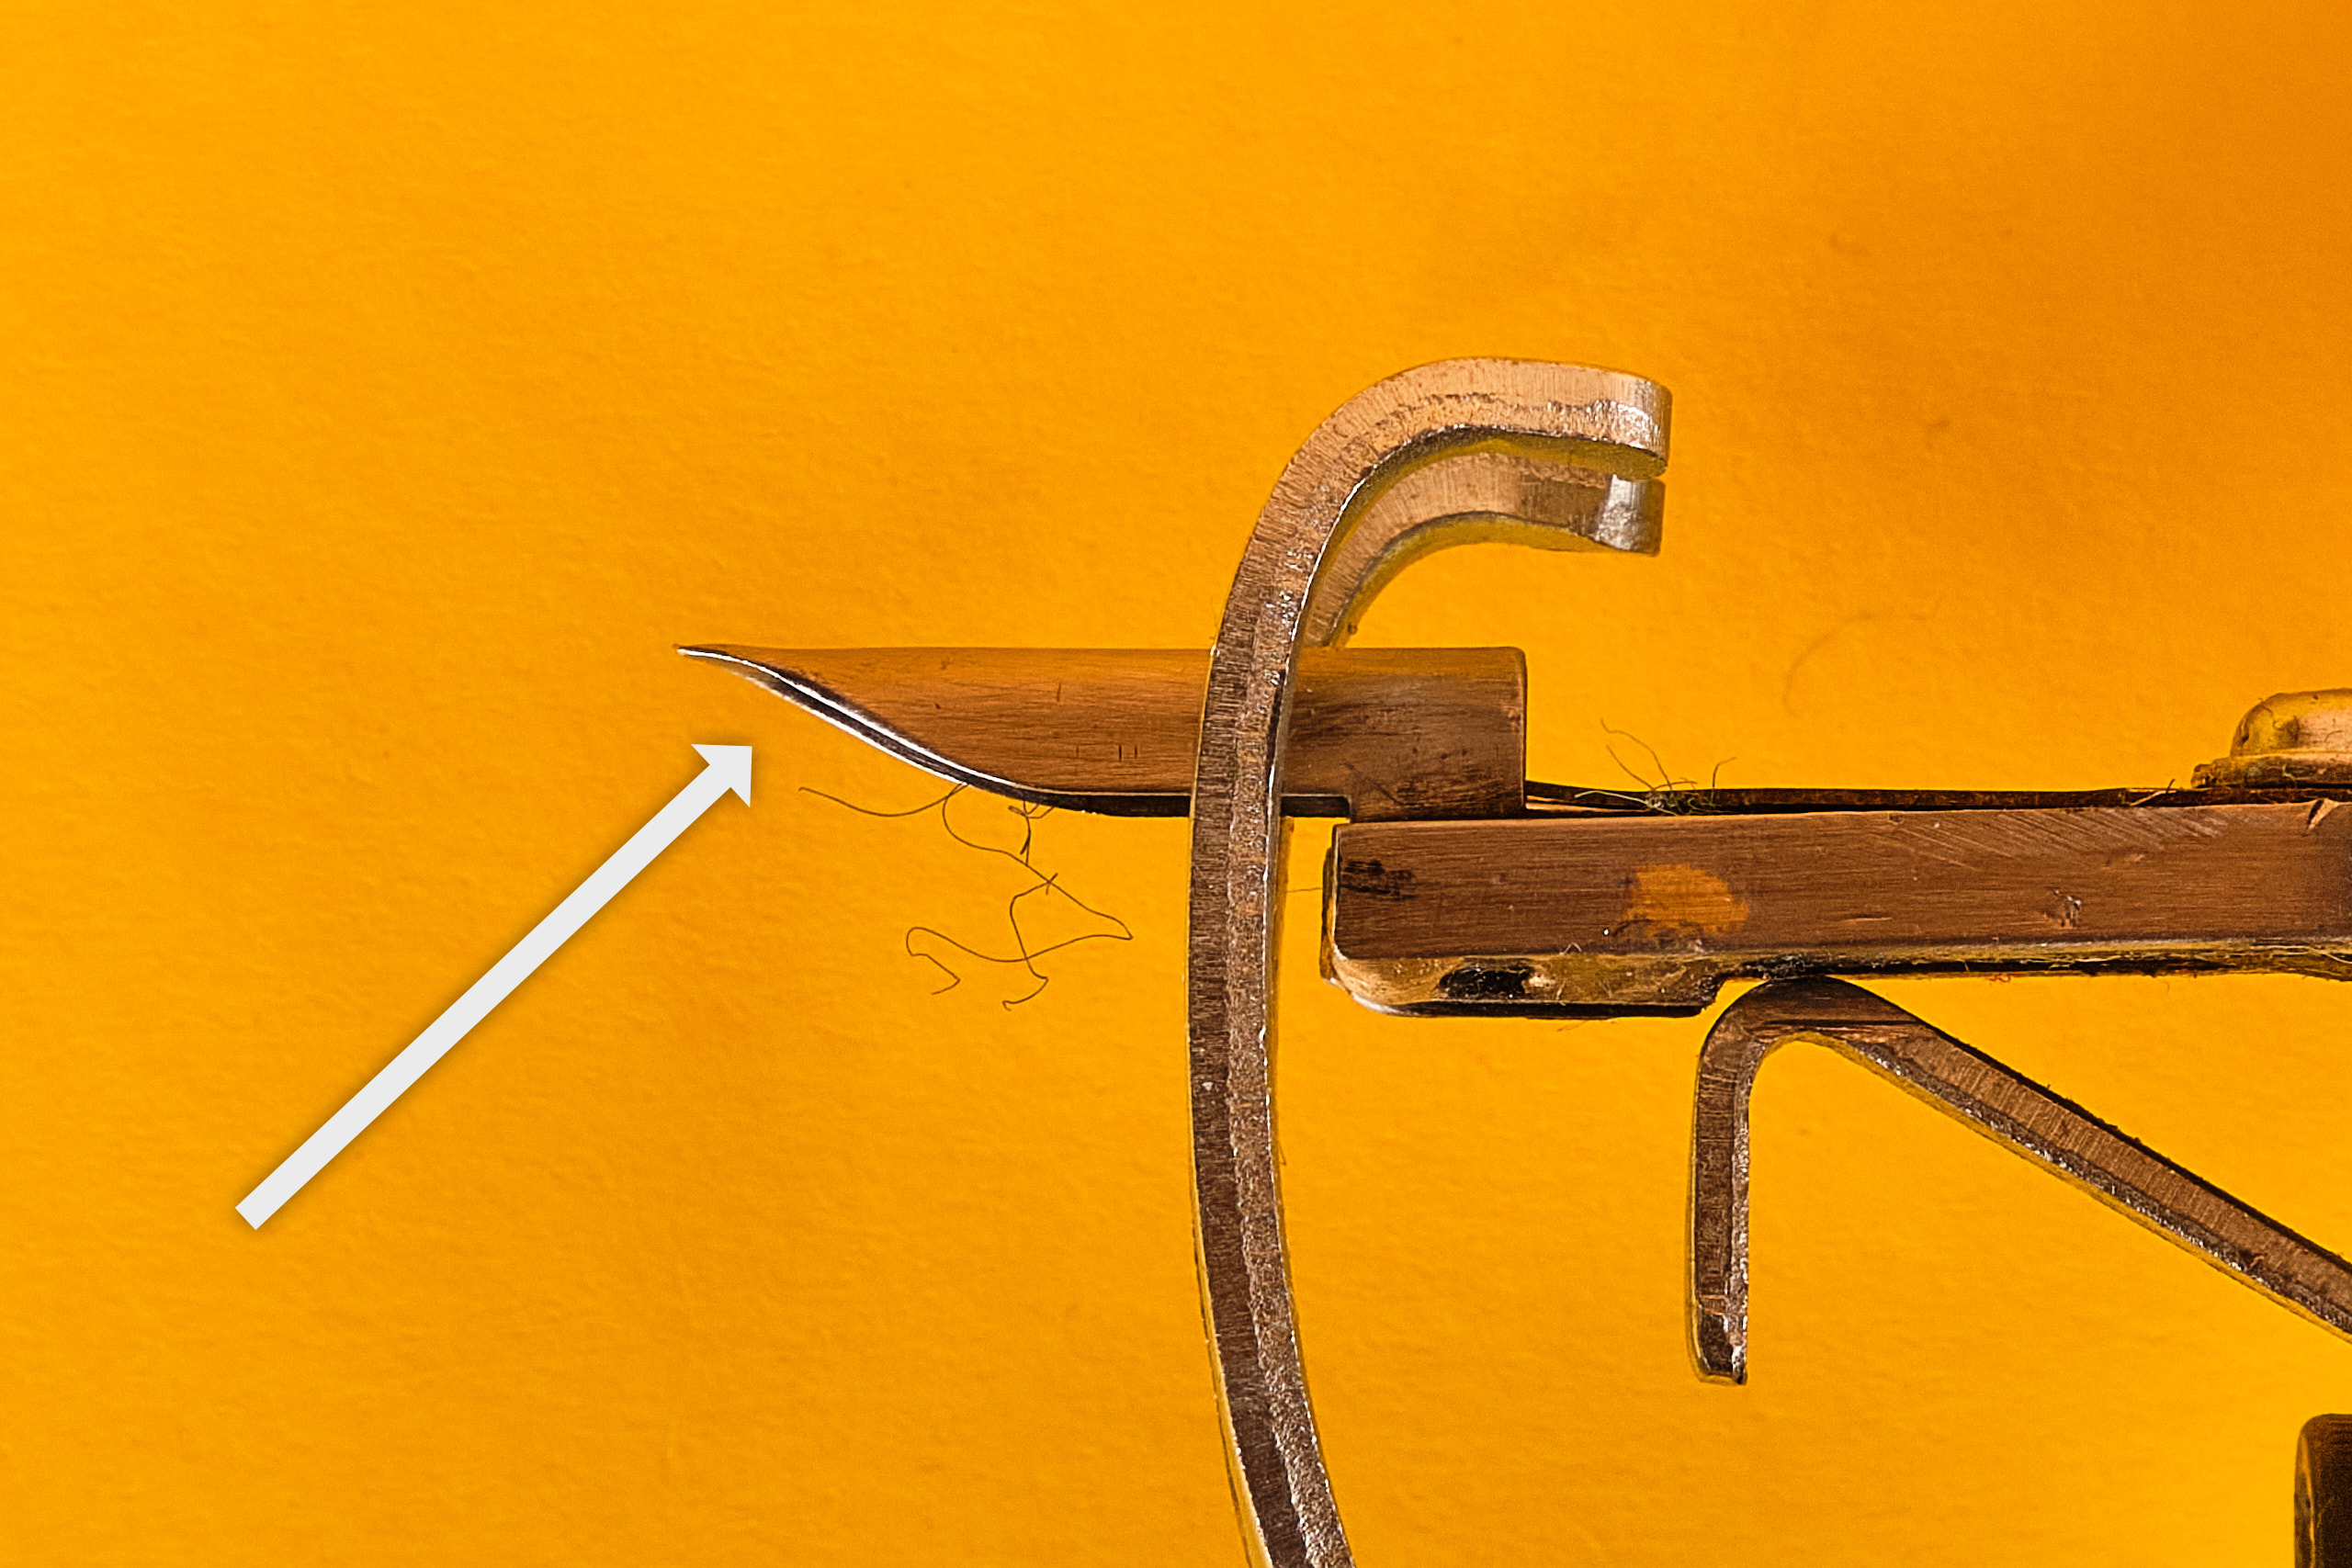
8 Guide
The guide is, as the name tells, guiding the yarn together with the needle and creates the loop.
Find a tutorial on how to replace it here.

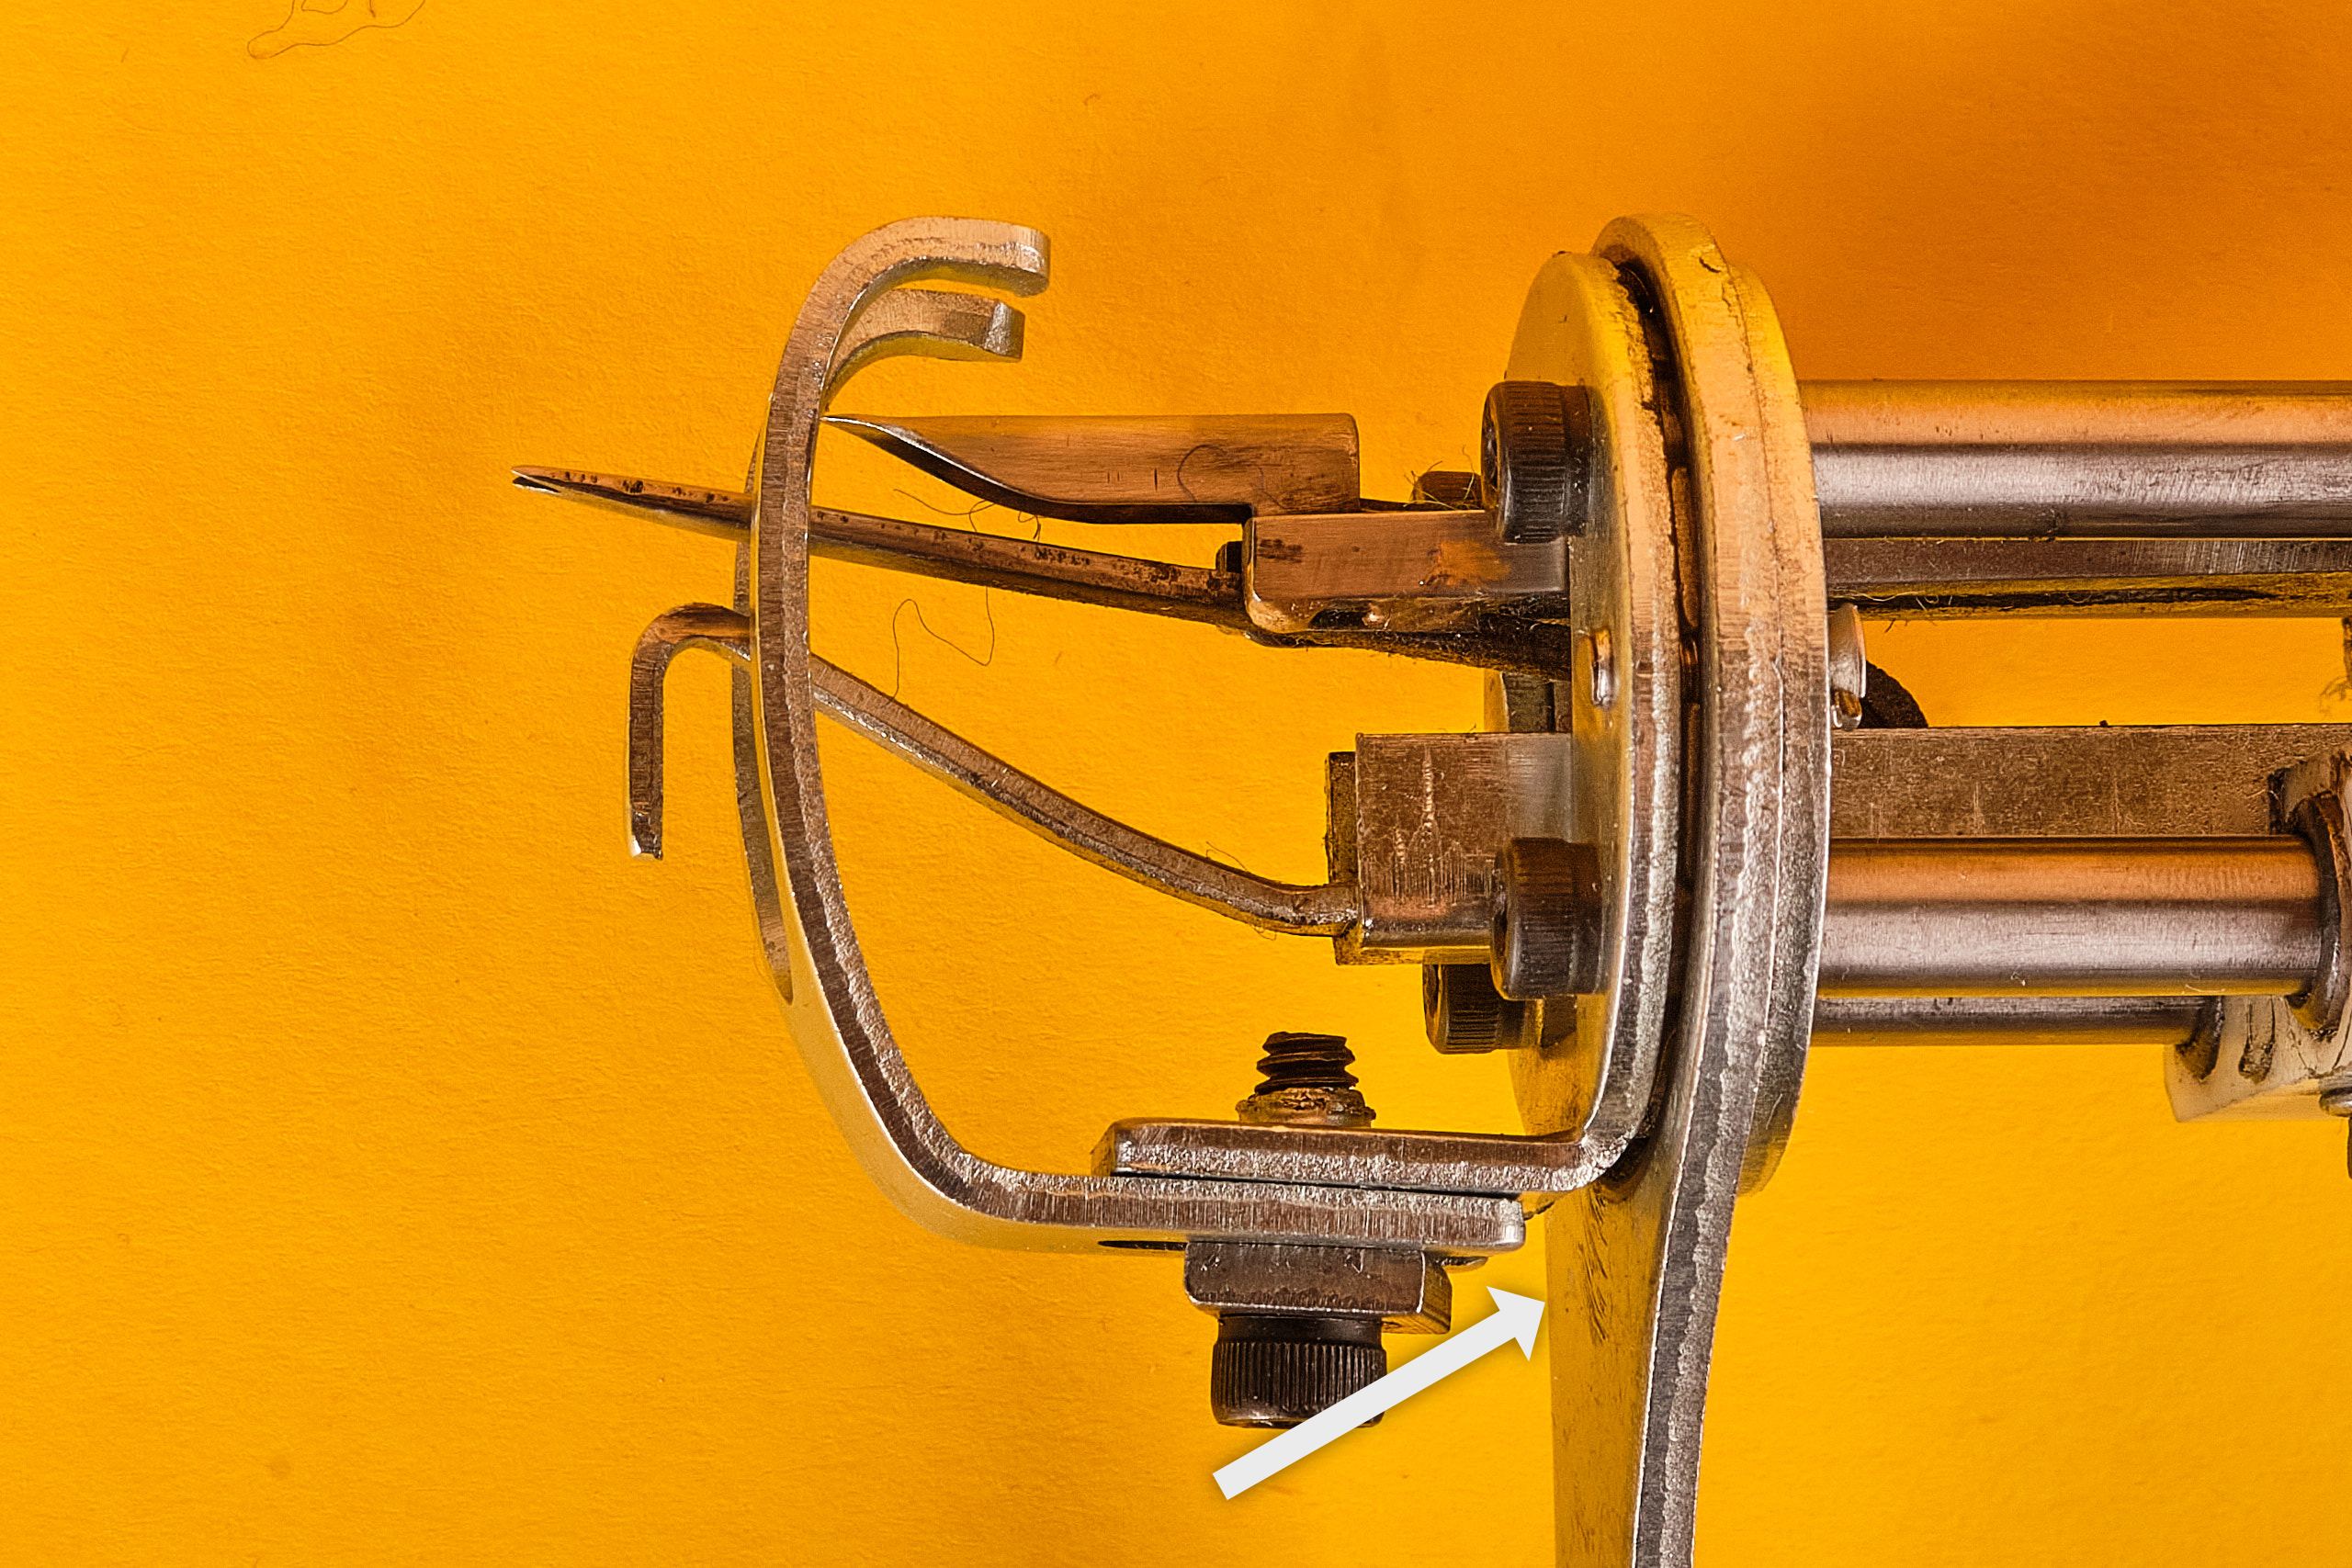
9 Pusher
The pusher is setting the pile height together with the guide. It’s pushing the tufting cloth away from the foot and helps moving the machine forward.
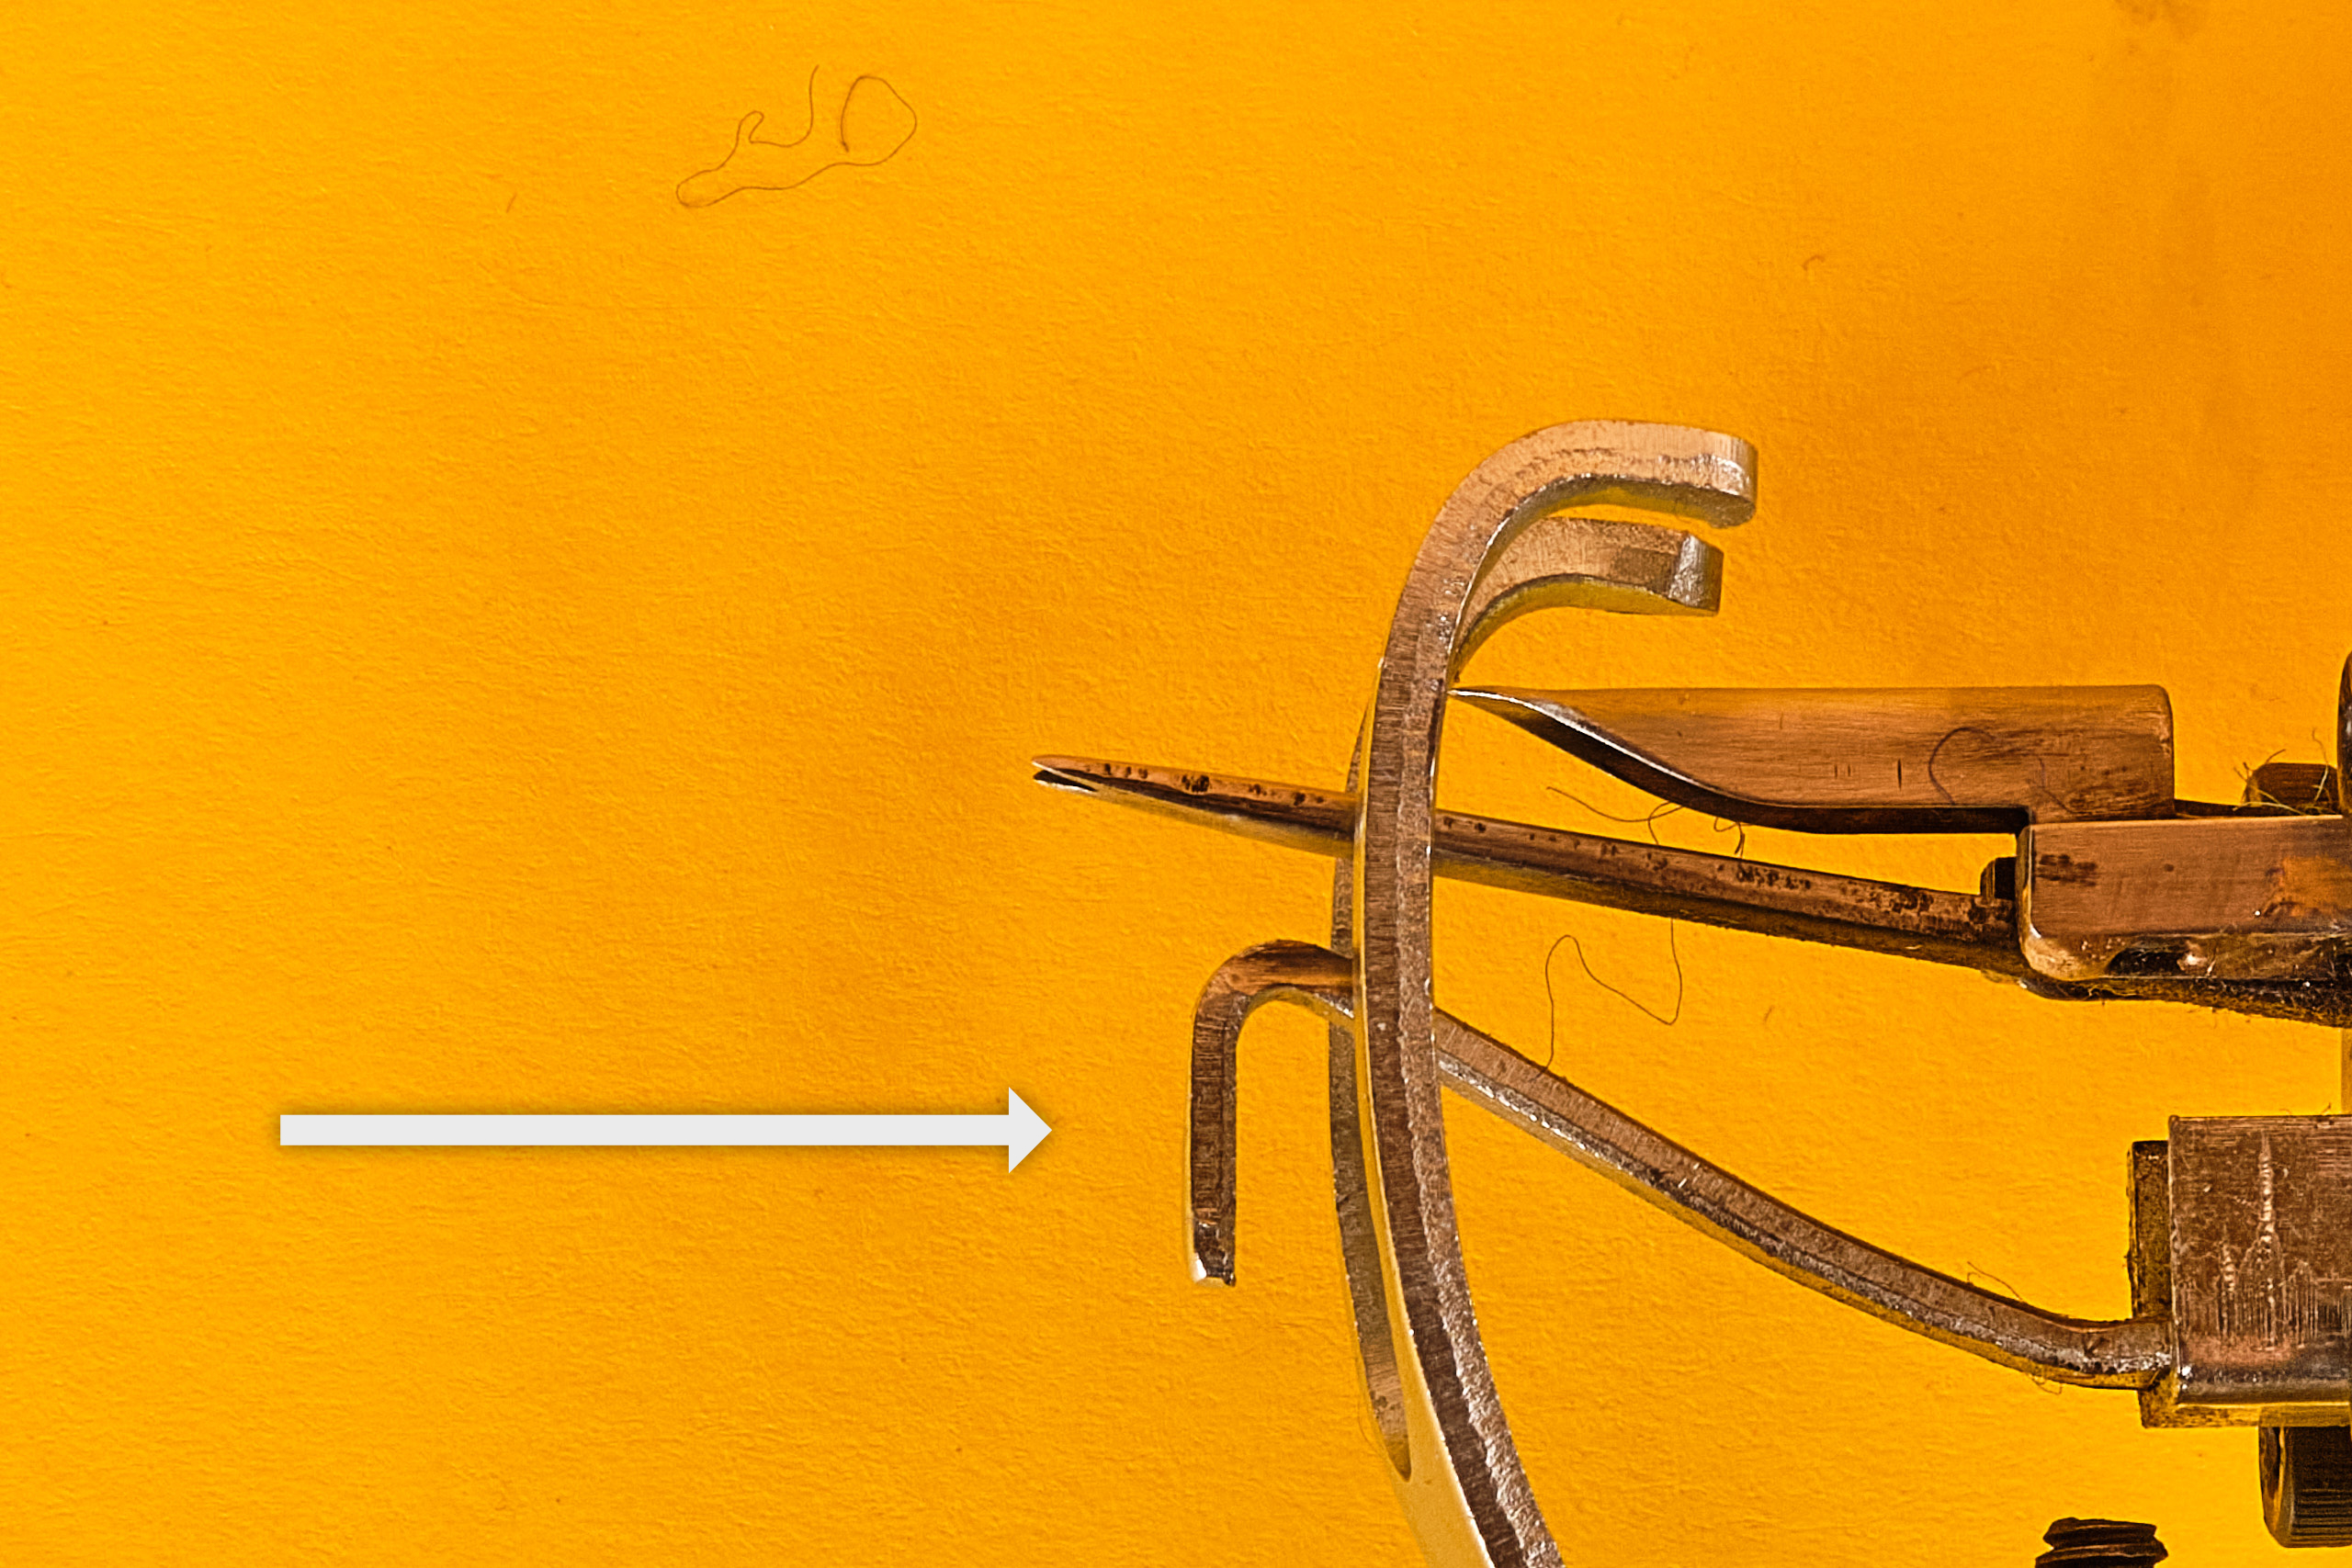
10 Foot
The foot is the surface of the tufting gun you push against the tufting cloth. Together with the correctly positioned needle, it’s also responsible to create an even weave.
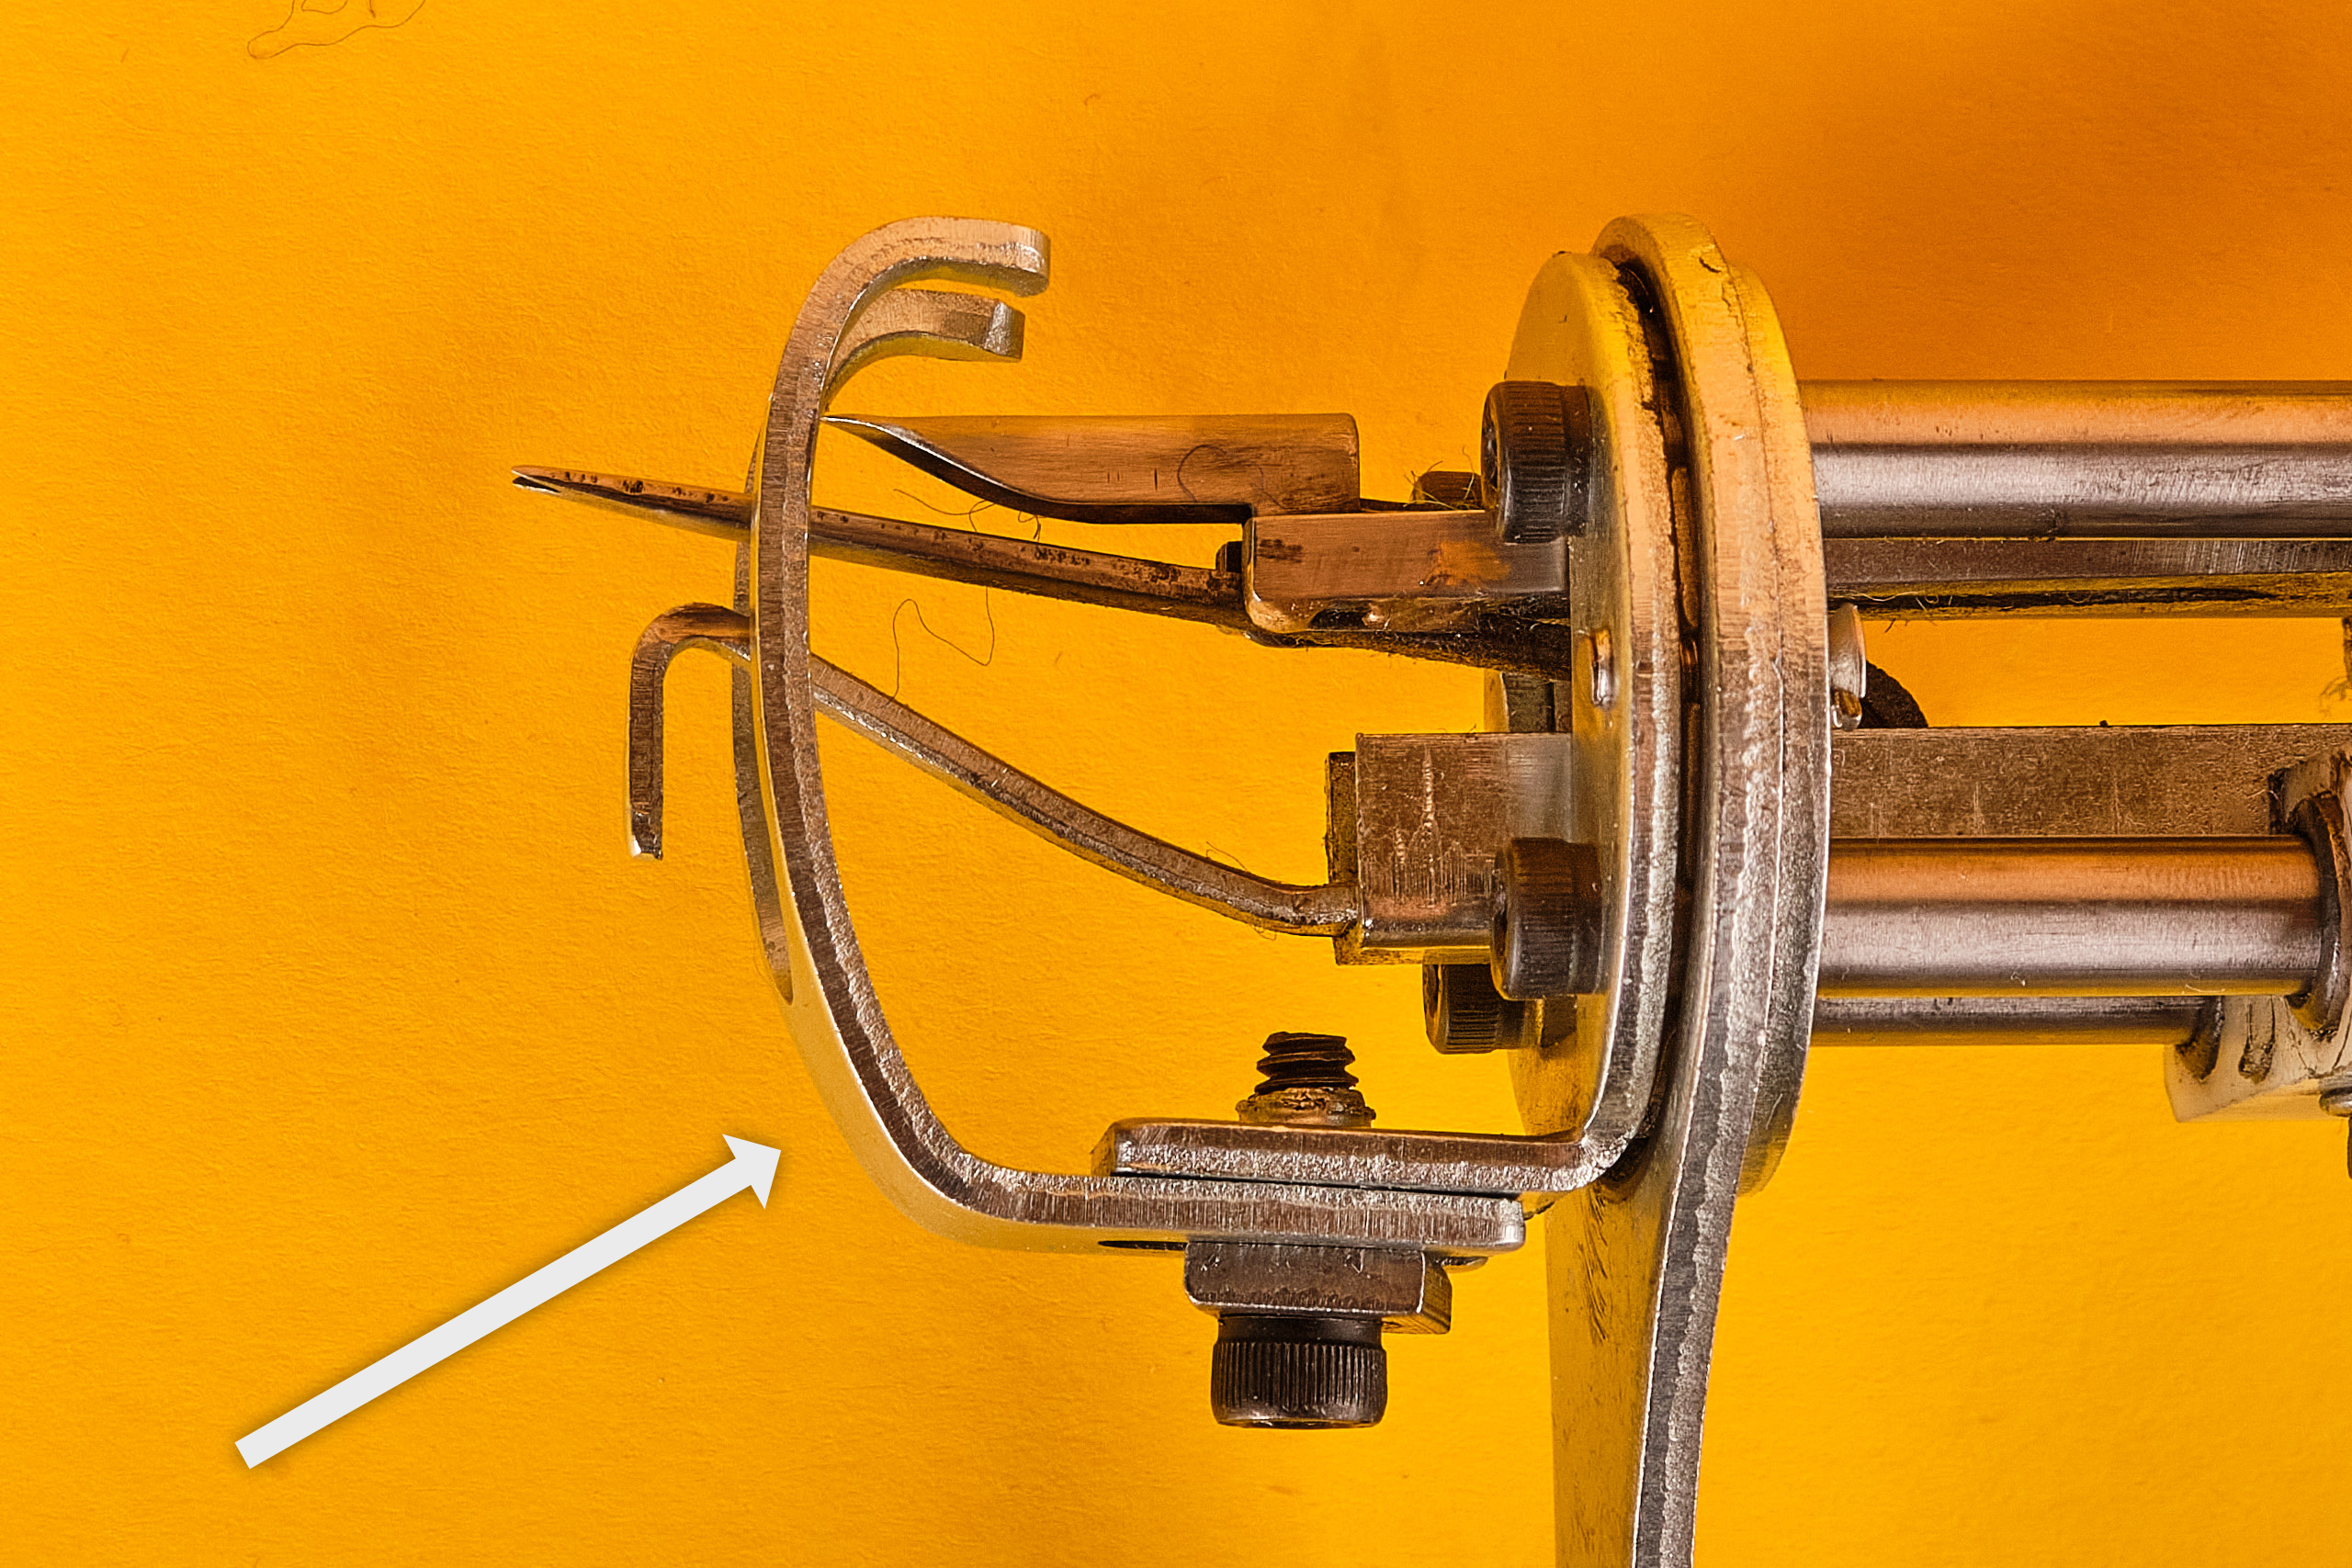
11 Pile height adjustment screw
With the help of this screw you are able to set your tufting gun to different pile heights.
For a tutorial on the highest possible setting, follow this link.

12 Lower Bearing
This part is connecting guide (8) and pusher (9) with the gear.

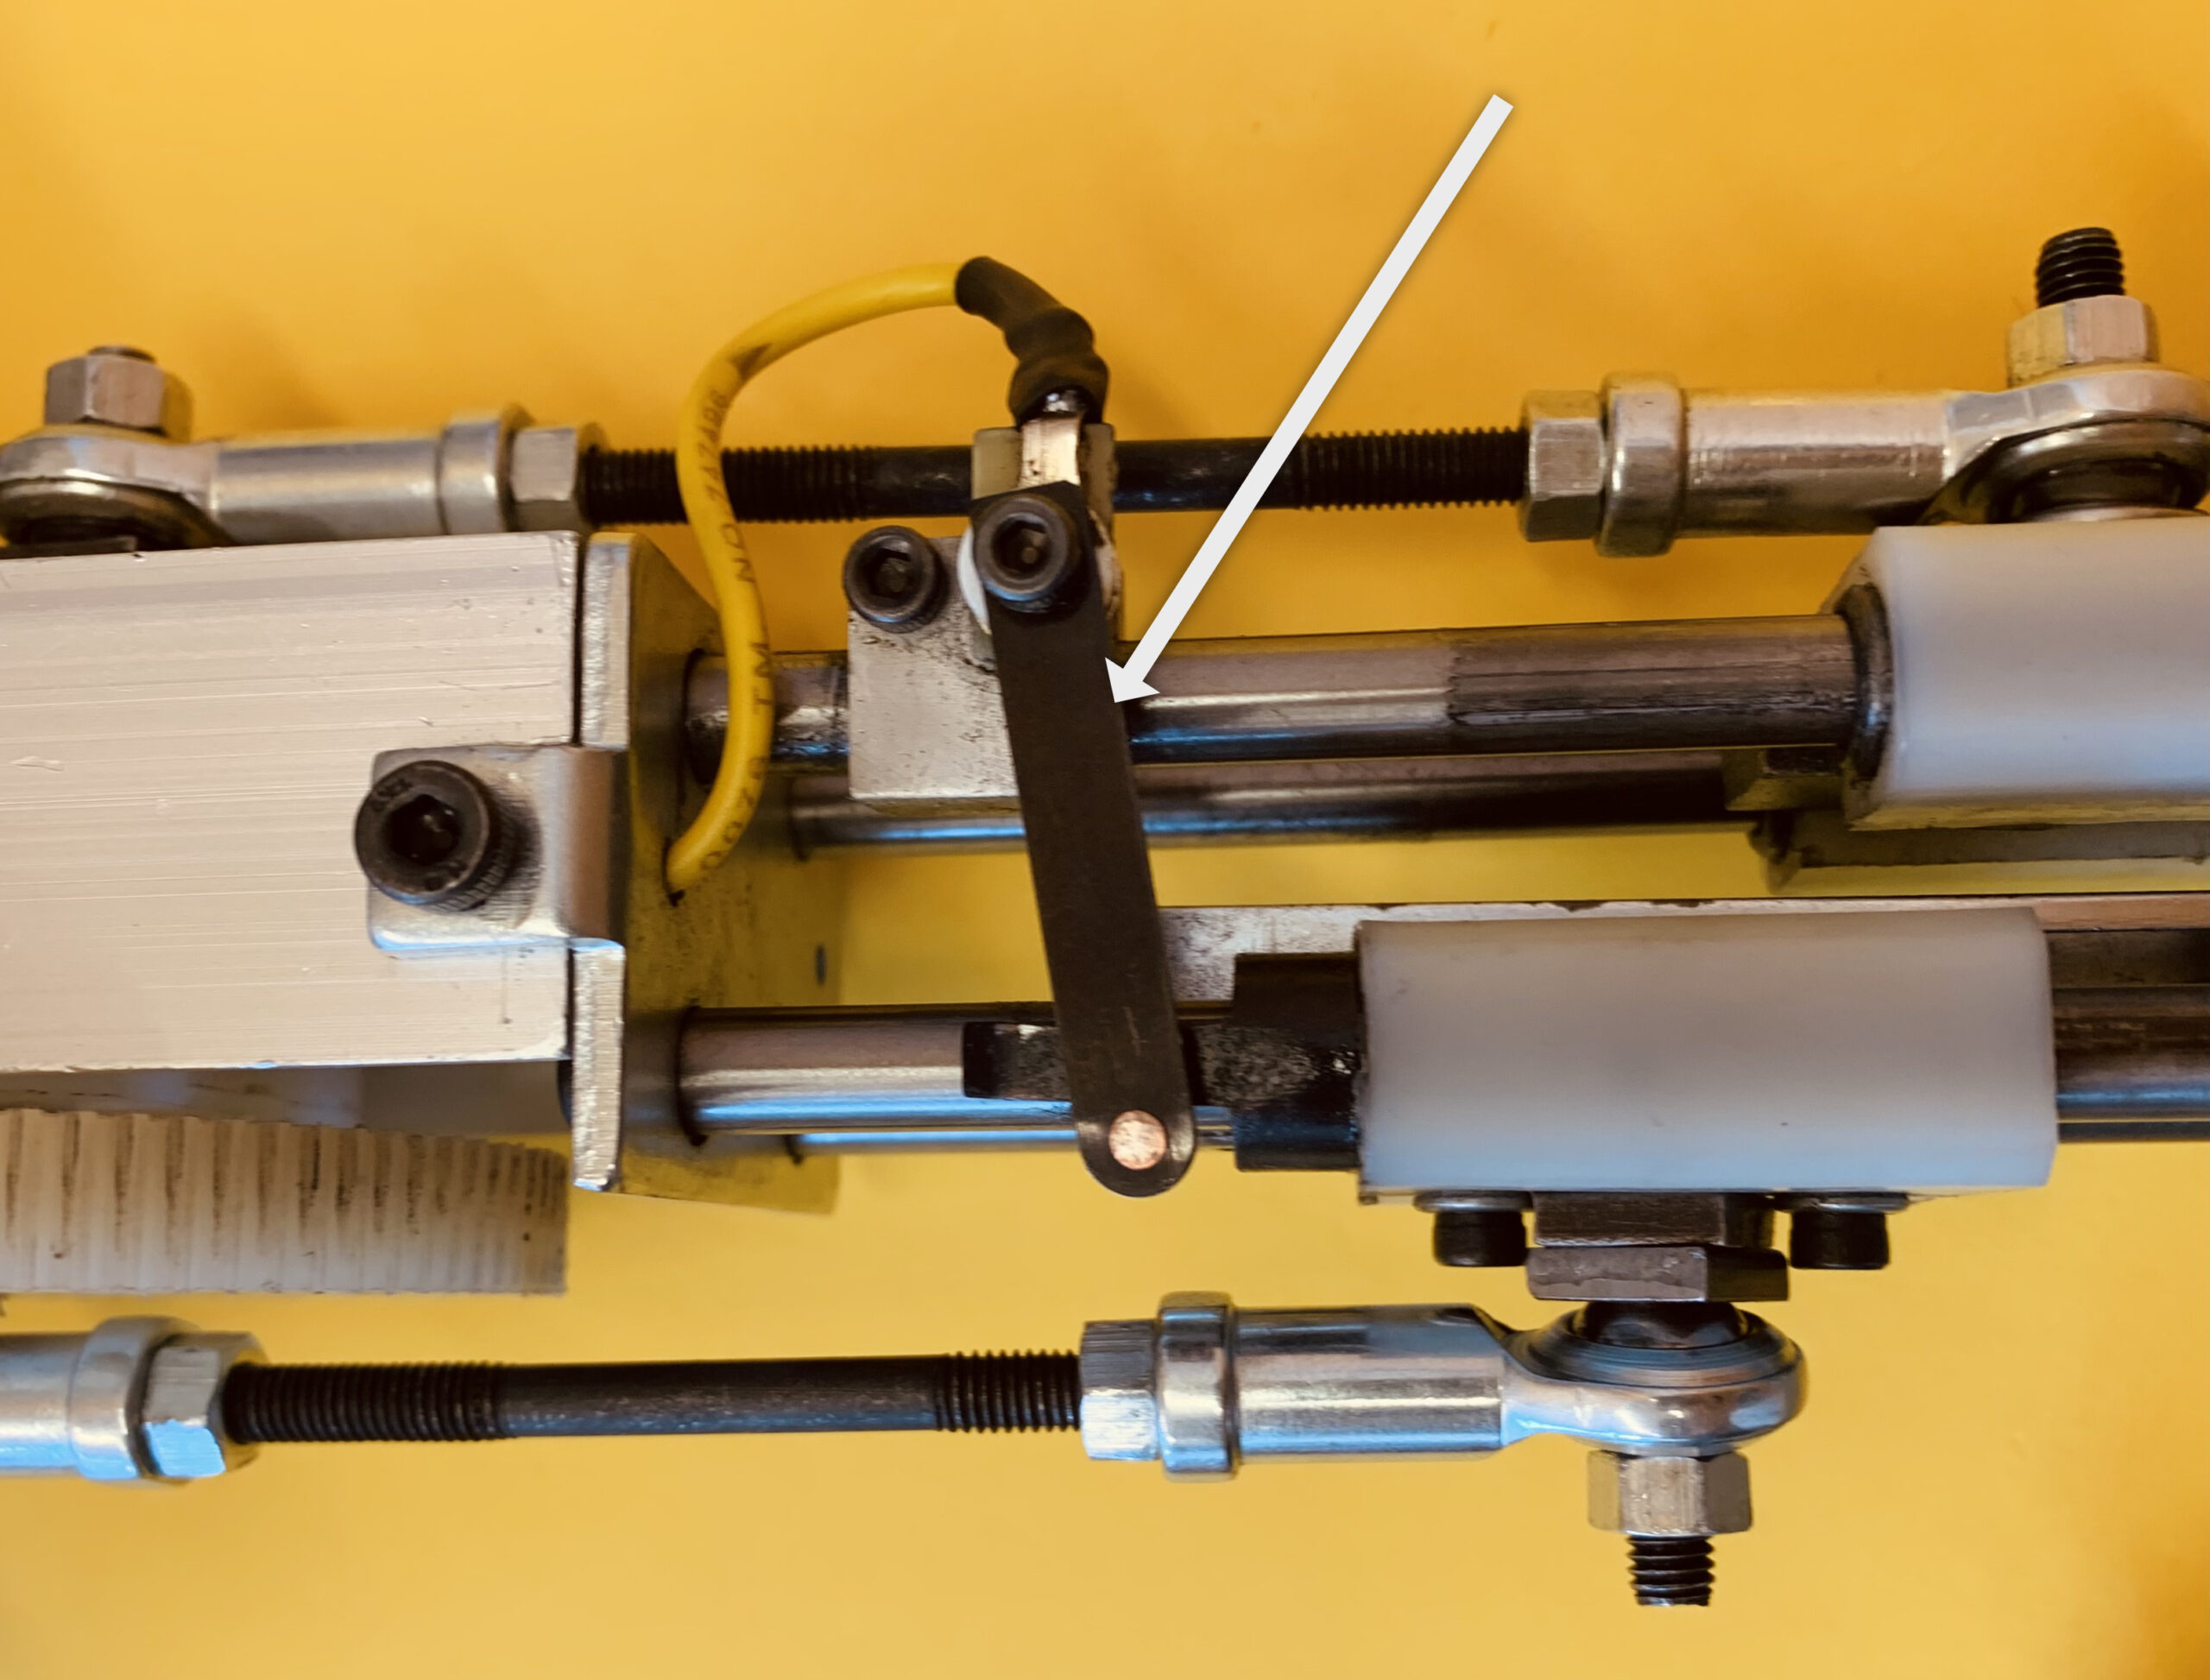
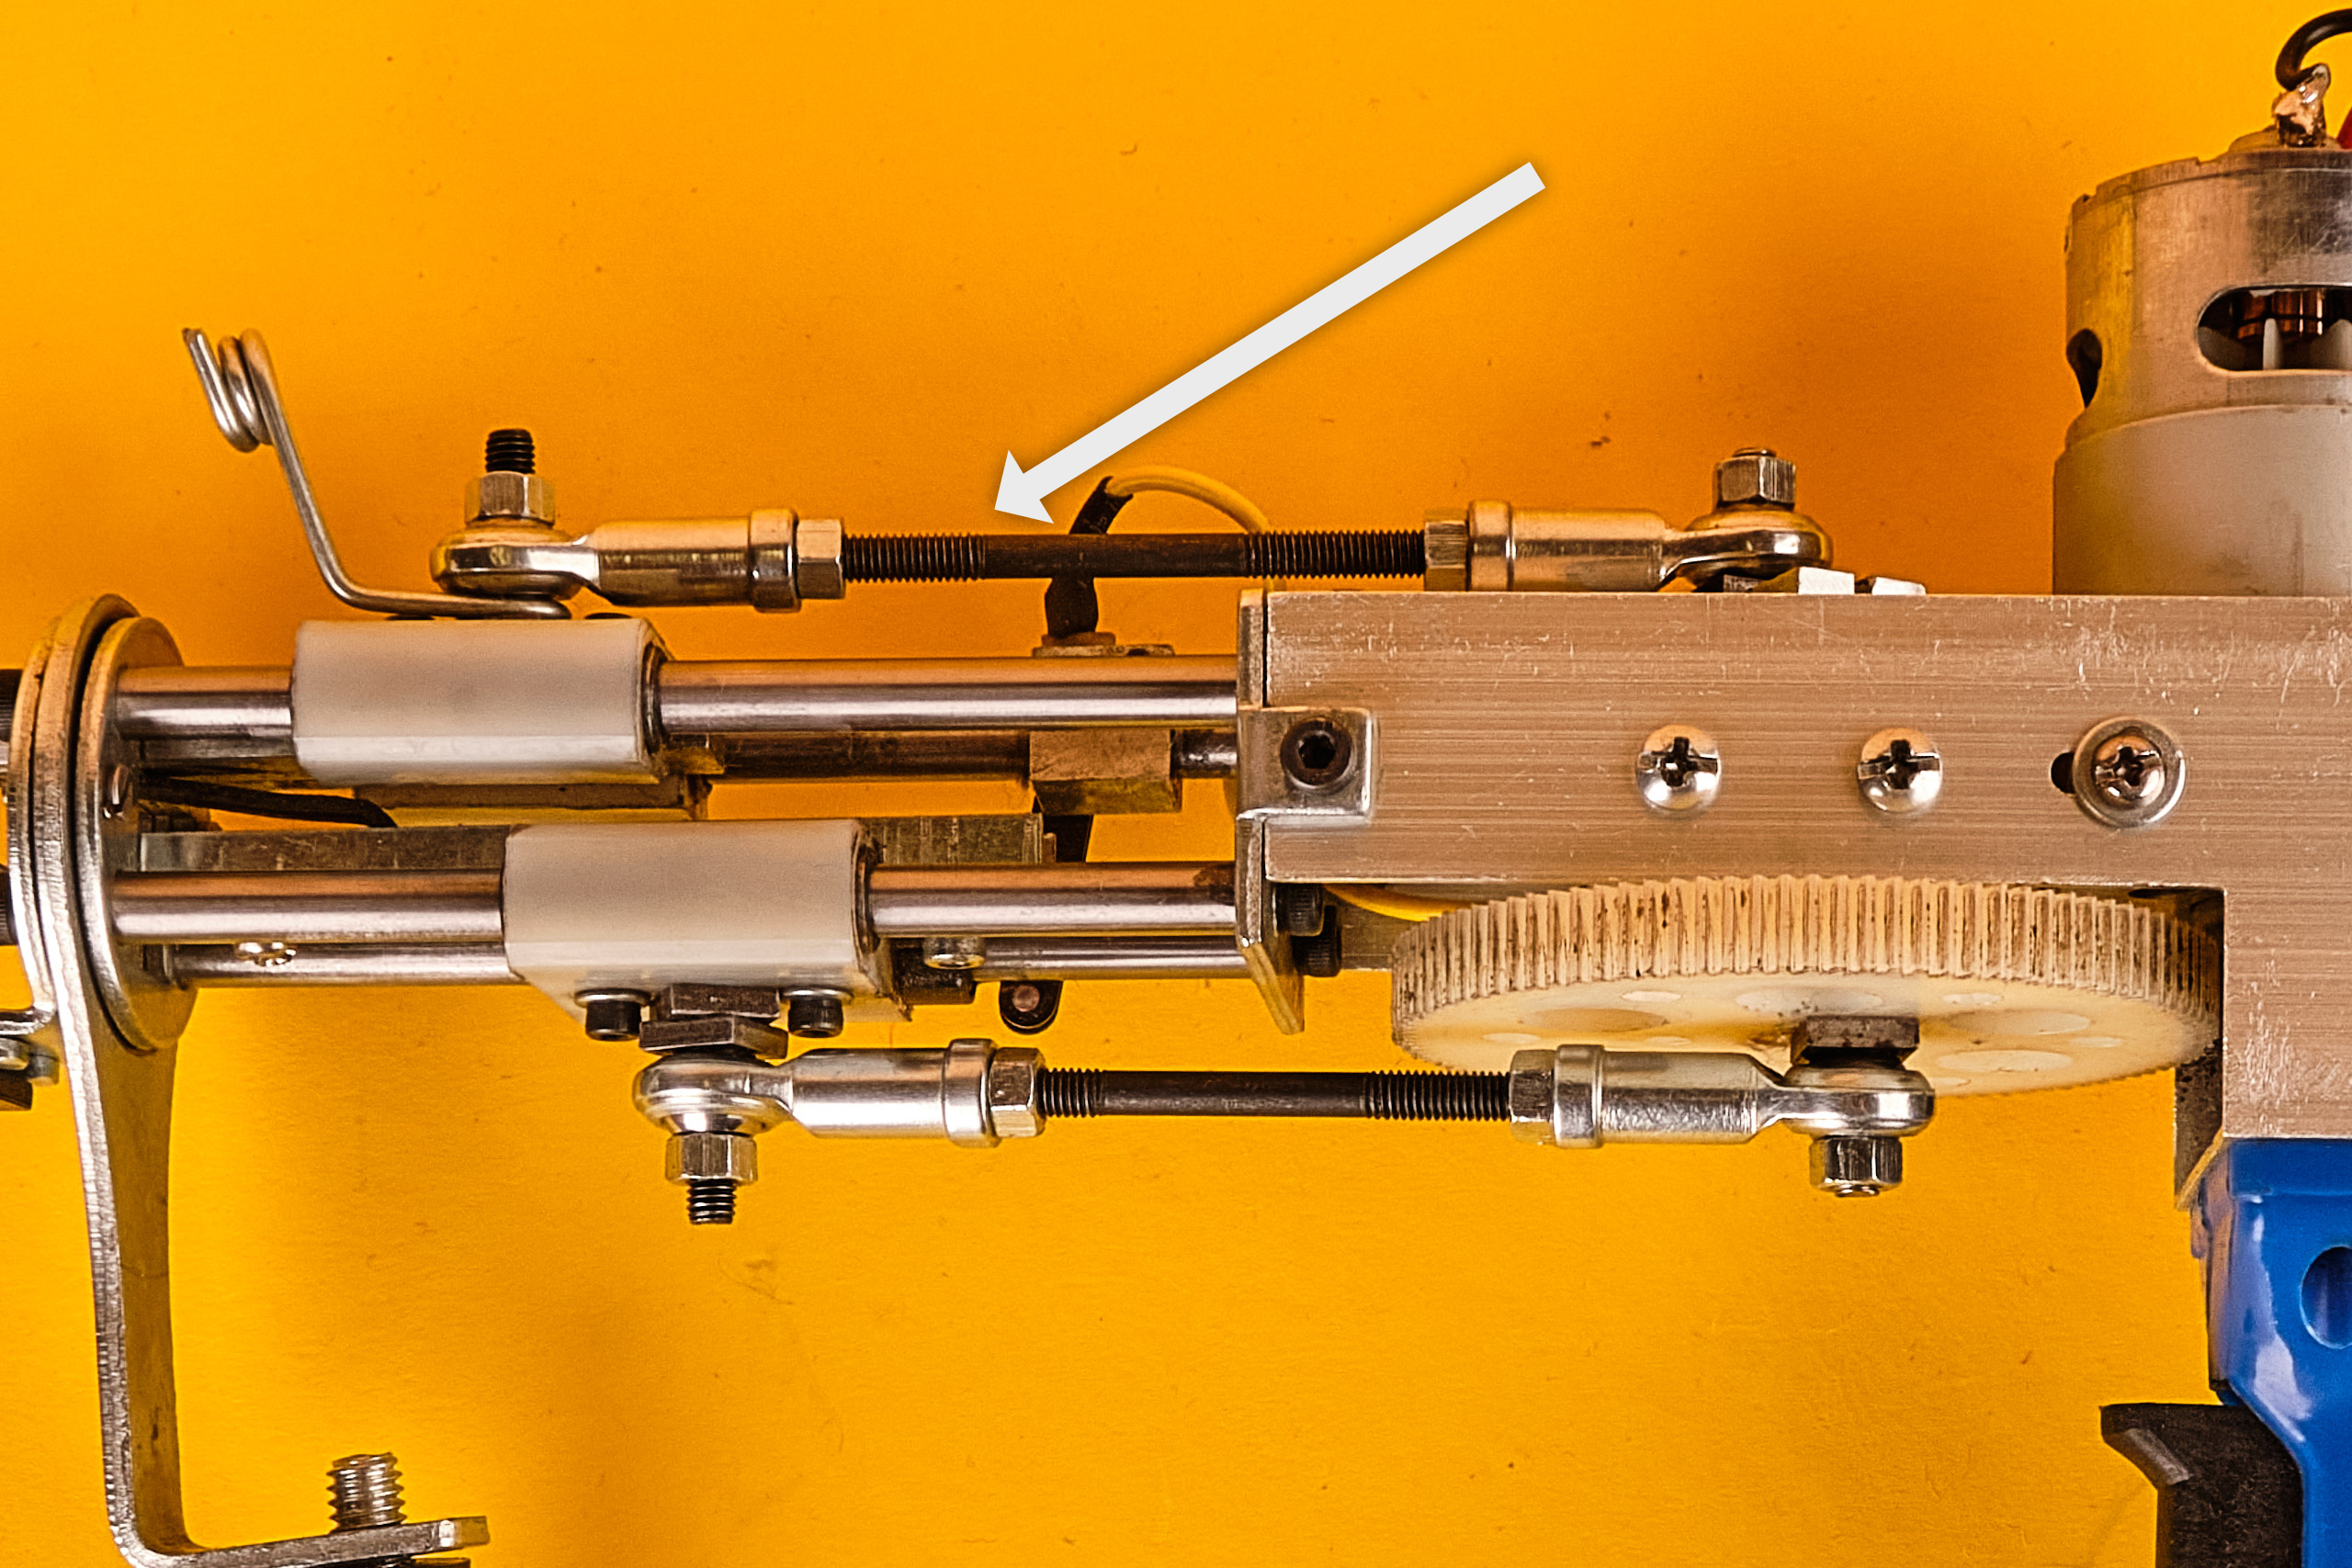
13 Top Bearing
This part is connecting the needle to the motor parts.
Top bearing: 57 mm (this never has to be touched, if you change this distance your position from needle to foot will be off!)
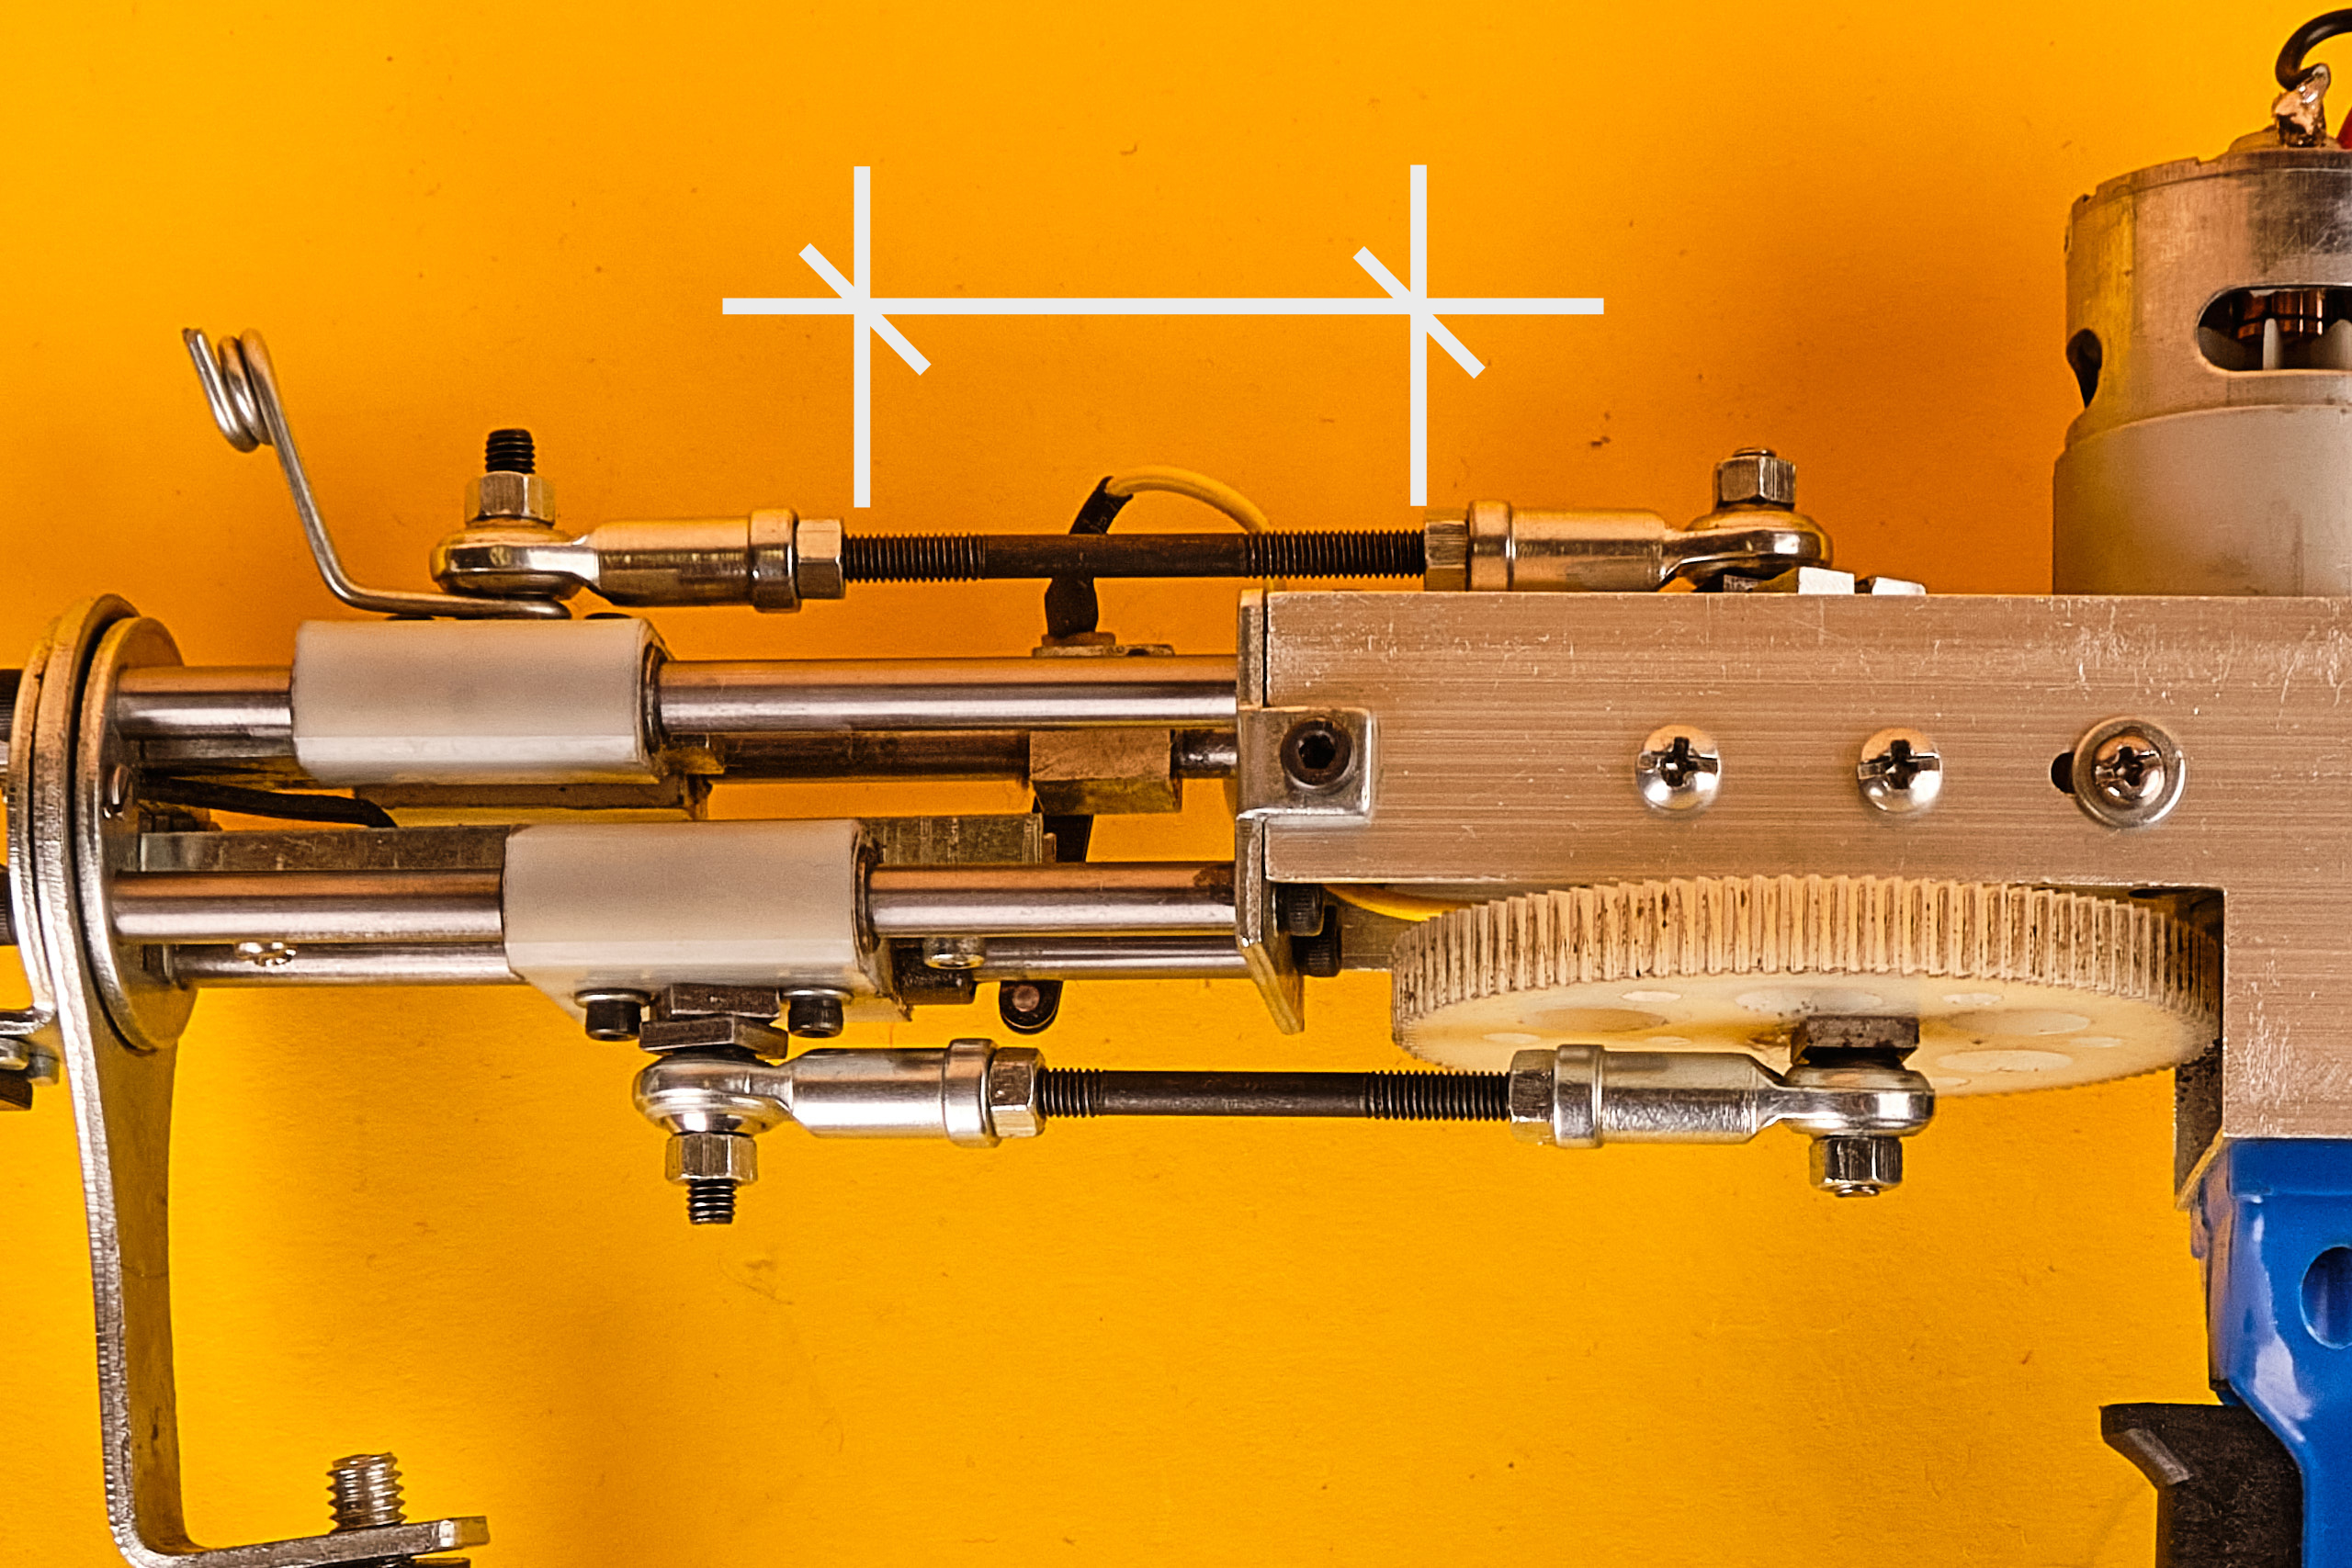
Bottom bearing: 57 mm
Foot: About 8 mm from the swivel / distance from needle support to foot 1mm